
Fall is almost here and I can’t wait to indulge in apples, pumpkins, hearty stews and soups, and all the treats the holidays have to offer.
But for now, I choose to live in a magical dreamland of everlasting summer with an inexhaustible supply of fresh berries.
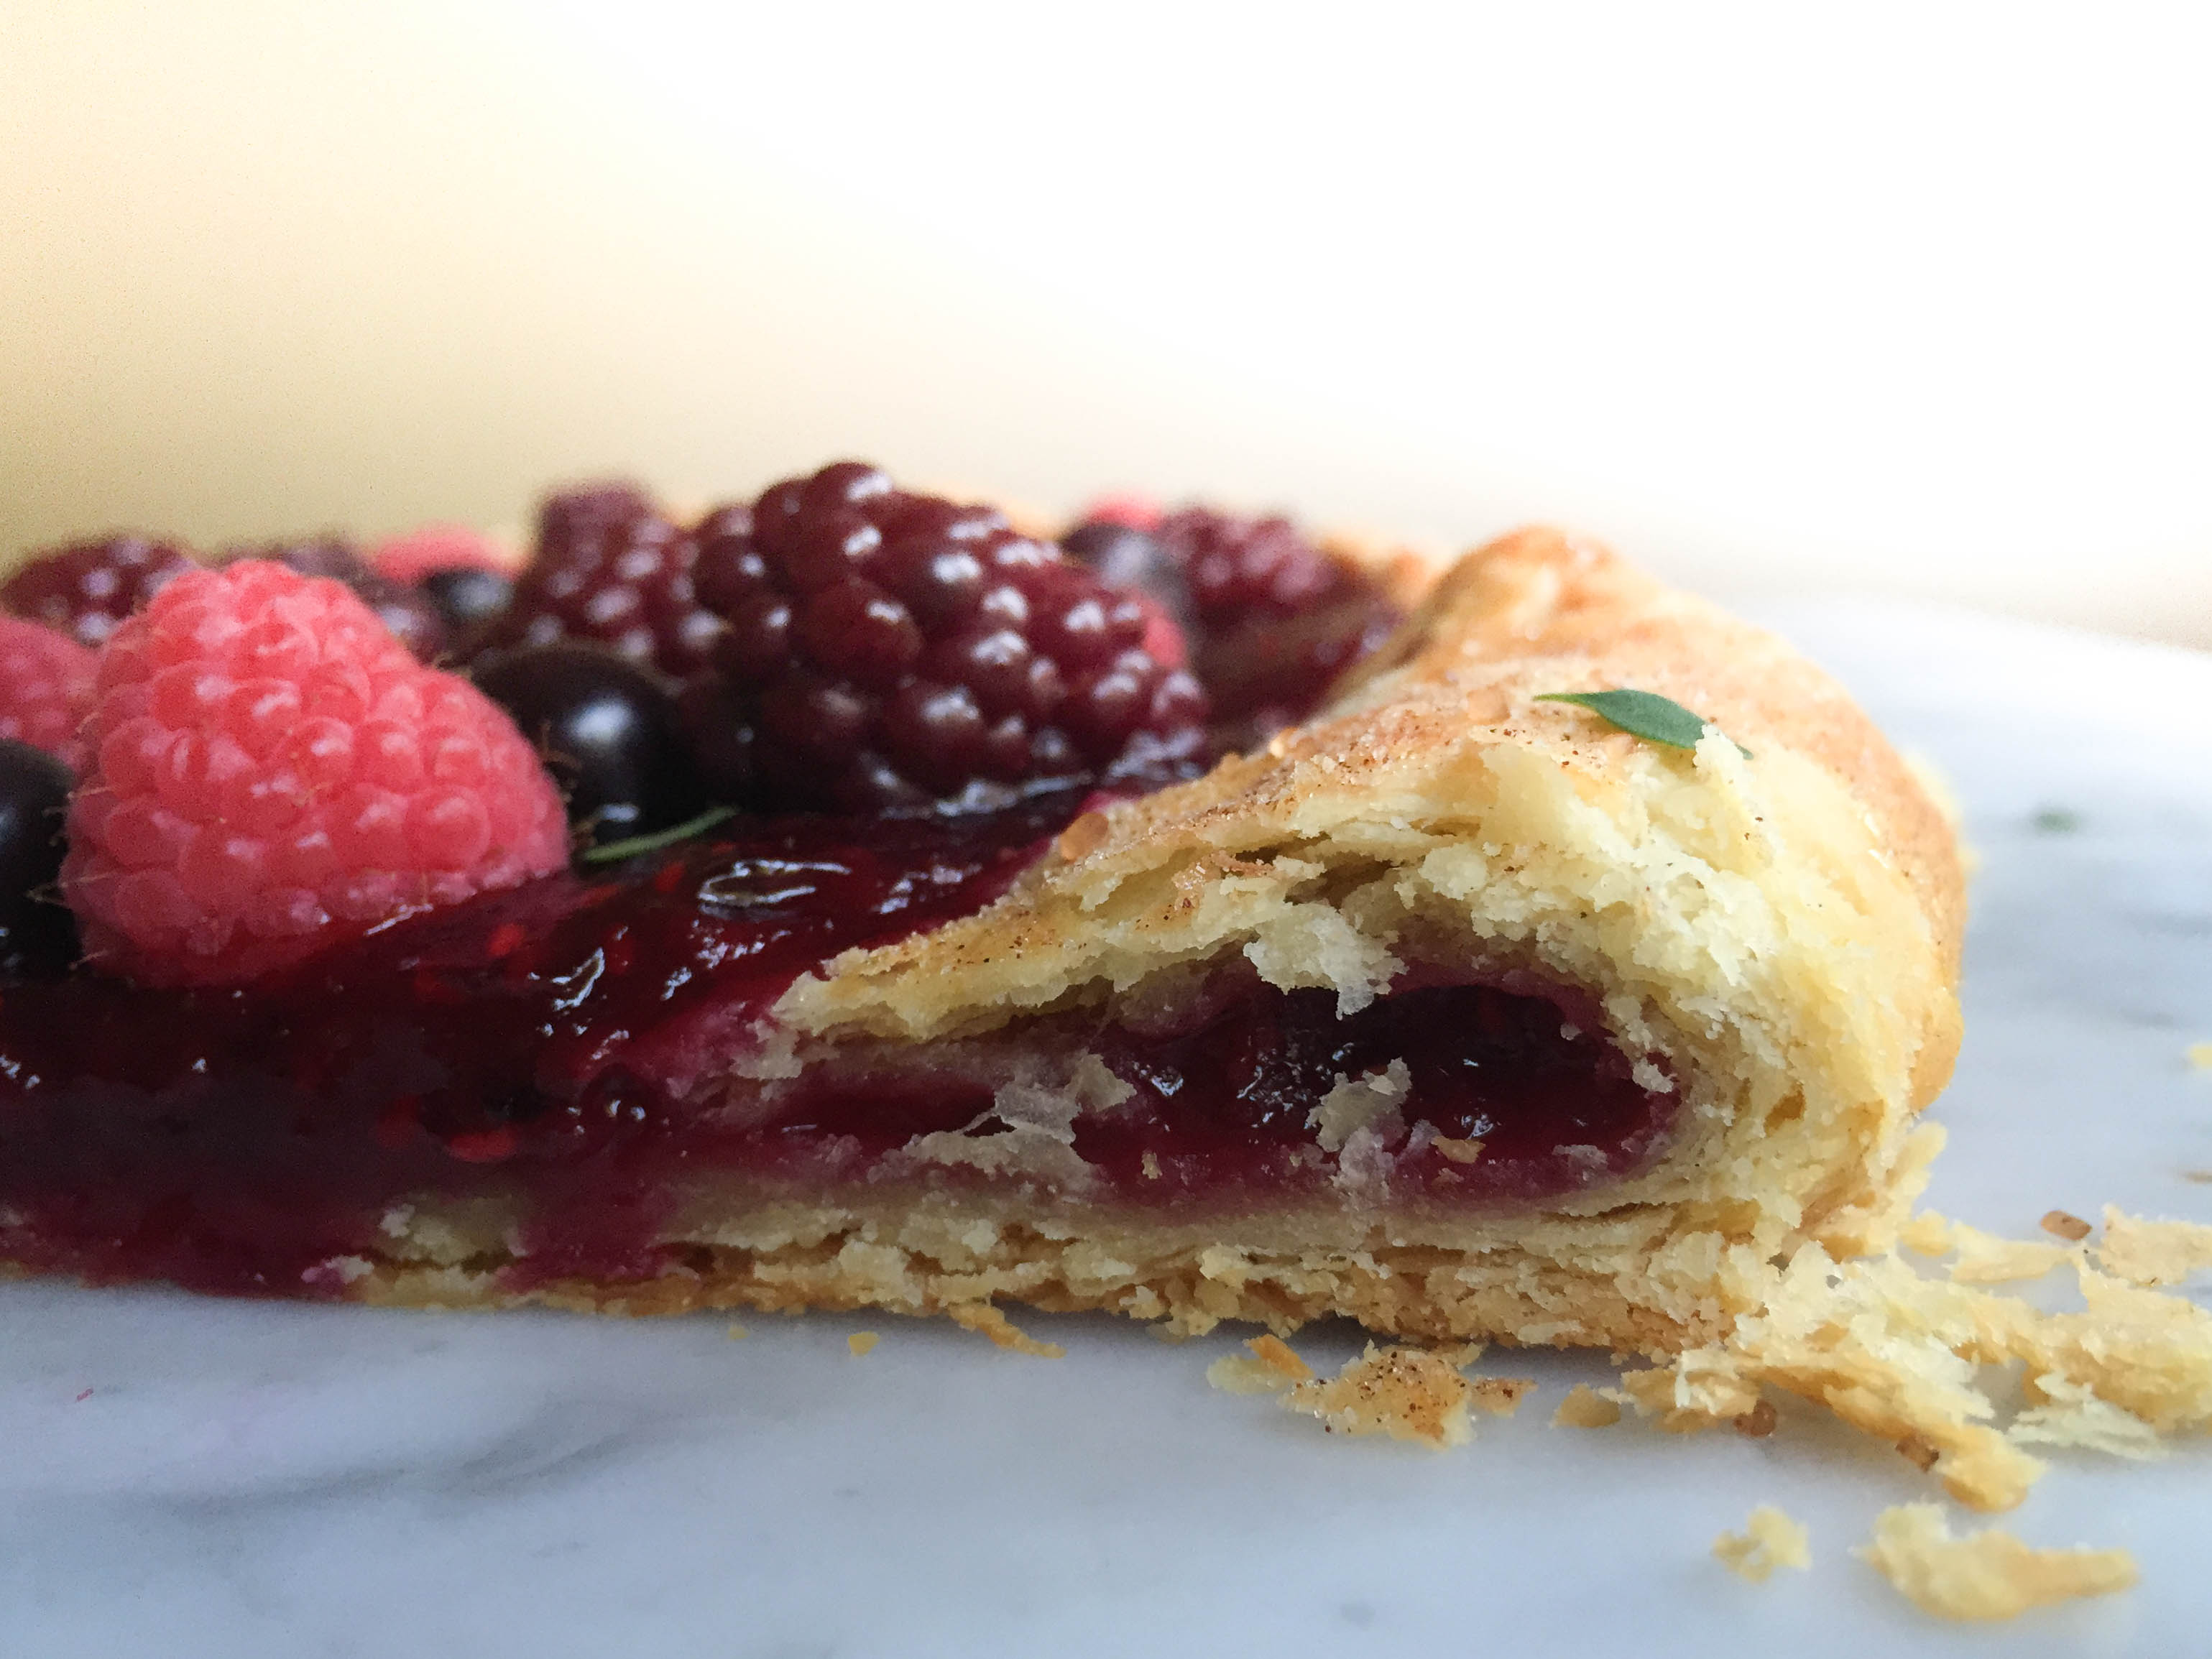
When I went to our local farmers’ market last weekend, the stalls were still filled with luscious blackberries, raspberries, and blueberries, just waiting to be turned into a delicious galette. If you can still get your hands on fresh berries like these, I suggest you run and get some right now. I promise, you will be glad you didn’t put this recipe off until next year.

These beauties are clearly deserving of an amazing dough to support them, and what would be better than a buttery, flaky pie crust?
Until very recently, I pretty much stayed clear of pies. To be honest, I was a little bit intimidated. Having been born and raised in Germany, pies were not a staple in my family. I never had a good point of reference for what the ‘perfect’ pie crust looks like, no family recipe to build upon, and no idea what everyone is talking about when they say that the crust should be ‘flaky’.
The turning point came a couple of weeks ago, when I heard someone say that it should be almost like puff pastry.
It really helps to understand what you want the end result to be, and suddenly everything made sense – I knew what my ‘flaky’ crust would have to look like, how to achieve it, and why it is so important to not overwork the dough. There really is nothing to be afraid of.
Now, if you are an experienced pie baker, this is obviously not news to you, so feel free to skip my technique ramblings and go straight to the recipe.
If you have had trouble in the past to consistently achieve a buttery and super flaky crust, then you might find the following tips very helpful.
I know that most families have their own secret recipes and techniques, and I am not going to make any claims that this recipe is the best, easiest, flakiest, tastiest, etc. pie crust ever.
However, it’s simple, super tasty, forms a beautiful, tender crust, and I’m just head over heels in love with it.
So, as soon as I knew I wanted my pie crust to be ‘almost like puff pastry’, I knew that I had to find a way to create lots of thin layers of butter in the dough.
One really easy technique to create these layers is to leave the butter in large cubes (mine usually measure about one cubic inch).
I’m sure most of you know that you should use cold butter for a good pie crust. By cutting the butter into larger cubes, you ensure that it stays cool just a little bit longer, giving you more time to turn it into beautiful butter flakes. If it’s a little warm in your kitchen, you can take one cube at a time of out the fridge and work them into the dough individually.
Once you have a cold cube of butter sitting happily in a bowl of flour, you are ready to go. The trick is to keep turning the butter cube in the flour and to continuously pinch large, thin butter flakes off of the main cube, using your thumb, index finger, and ring finger. (See the poor pinched cube on the right in the picture below and the large flakes right above it?)
The flour will keep the butter from sticking to your fingers, so keep turning the cube and dipping your fingertips into the flour as you go.

Once you have turned all of your butter cubes into flakes, it’s time to mix the dough. If it’s really warm and you feel like your butter flakes are about to disintegrate, simply pop the bowl back in the fridge for 15 minutes before you proceed. When you are ready, add salt and ice-cold water and – very, very gently and slowly – start stirring the dough (be careful not to actually break up your butter flakes). Stop as soon as the water has been absorbed by the flour and the majority of the ingredients are starting to turn form a crumbly powder into a somewhat cohesive mass. Then lift up one side and fold the dough over on itself, pressing down gently. Repeat the folding until all the crumbs at the bottom of the bowl have been incorporated into the dough. You should still be able to see large bits of butter. Wrap the dough in plastic wrap and let it rest in the fridge for about half an hour. That’s all there is to it.
Since berries contain a lot of water, I prefer to make a quick jam instead of placing the raw berries directly on the dough. The last thing you want after all that butter pinching is a berry-juice-soaked soggy pie crust ruining your day.
Now, are you ready for the recipe?
Here’s what you’ll need:
For the dough:
- 120 g butter (I use European style butter with a fat contents of 82% or more)
- 250 g flour (plus a little bit for rolling the dough)
- a pinch of salt
- 100 ml ice-cold water
For the berry topping:
- 400 g fresh mixed berries (I used blackberries, blueberries, and raspberries)
- 110 g sugar
- 10 g vanilla sugar (if you don’t have vanilla sugar, add 10 g of regular sugar and 1/4 teaspoon of vanilla extract)
- 1 tablespoon fresh lemon juice
For the egg wash:
- 1 egg yolk
- 1 tablespoon heavy whipping cream
- a little bit of cinnamon and sugar to sprinkle on the crust
For the whipped sour cream:
- 1/3 cup sour cream
- 1/2 tablespoon vanilla sugar
- 1/4 teaspoon almond extract
- 1-2 twigs of lemon thyme
- Place the water in the freezer so it will be nice and cold once you are ready to use it. (Also place a saucer or small plate in the freezer, if you want to do a gelling point test for the jam.)
- Carefully wash and dry the berries. Pick about a handful of the prettiest berries and set them aside for later. Place the rest of the berries in a medium sized pot, add the sugar, vanilla sugar, and lemon juice, and bring to a boil. Let the mixture boil for about 10 minutes, stirring constantly, until it starts to thicken. To make sure your jam is done, take the plate out of the freezer and spoon a teaspoon of jam onto it. Let it sit for about 30 seconds, then push your fingertip into the jam. If it has formed a skin and wrinkles, it’s ready. Set the pot aside and let the jam cool.
- Place the flour in a large bowl. Cut the butter into large cubes (about a cubic inch in size) and pinch off large, thin butter flakes using your fingertips (see my explanation above).

- Add salt and ice-cold water and stir the mixture very gently and carefully. As soon as all the water has been absorbed and the dough starts to become sticky and cohesive, start folding it over onto itself several times until all the crumbs have been incorporated into the dough. Tightly wrap the dough in plastic wrap and let it rest in the fridge for about 30 minutes.
- While the dough is resting, preheat the oven to 400°F and line a baking sheet with parchment paper (do NOT preheat the baking sheet, it will cause the butter to melt out of the dough too fast). In a small bowl, combine the yolk and the heavy whipping cream for the egg wash. Prepare a small bowl of sugar and add cinnamon to taste.
- Take the dough out of the fridge and place it on a lightly floured surface. If it seems extremely solid and cracks very badly when you try to roll it out, let it sit at room temperature for a couple of minutes.

See those large bits of butter? That’s exactly what you are looking for. - Roll the dough out to the desired thickness and shape. Give it a quarter turn after each roll to prevent it from sticking. If you notice that it starts to get sticky, gently lift the sides up a bit, sprinkle a little bit of flour under and on top of the dough, turn (spin, not flip) it to distribute the flour, and keep going. I like mine about 1/8 inch thick.

- Cut of the edge with a pizza cutter or knife (this is completely optional). Sprinkle a little bit of flour on your rolling pin and carefully roll the dough onto the pin to transfer it to the baking sheet. Using a fork, poke a couple of holes into the dough surface to prevent it from bubbling up too much during the baking process.
- Spread the berry jam on the dough, leaving a border of at least 1 inch all around. Fold the edge over towards the center to provide a barrier for the berry topping. Start on one side and slowly work your way around the galette, creating little crease folds in regular intervals.
- Using a pastry brush, apply a thin layer of egg wash on the edge of the dough. Sprinkle the edge with the sugar/cinnamon mixture.
- Bake at 400°F for 20 minutes. Remove the galette from the oven, place the whole berries you set aside earlier on top of the berry topping, and continue baking it for about 10 minutes at 350°F. It’s done when the crust looks golden brown and crispy. You can carefully lift up the side and peak underneath to check if the bottom is completely cooked.
- Remove the galette from the oven and transfer it to a cooling rack, let cool completely.
- Whip the sour cream with the vanilla sugar and almond extract.
- Serve the galette with a spoonful of sour cream, sprinkled with lemon thyme, and dream of an endless summer.

Enjoy!


