Gingerbread houses are magical.
They combine the joy of baking and the excitement of building something from scratch with the fun of playing and decorating (and, let’s be honest, eating a whole bunch of candy while you’re at it is another huge perk).
Whether you are making one to entertain your kids or to indulge your inner child, it’s the perfect rainy/snowy afternoon project for the whole family. And when you’re done admiring it in all it’s sugary glory, you get to eat it, too.
So what makes this recipe so special?

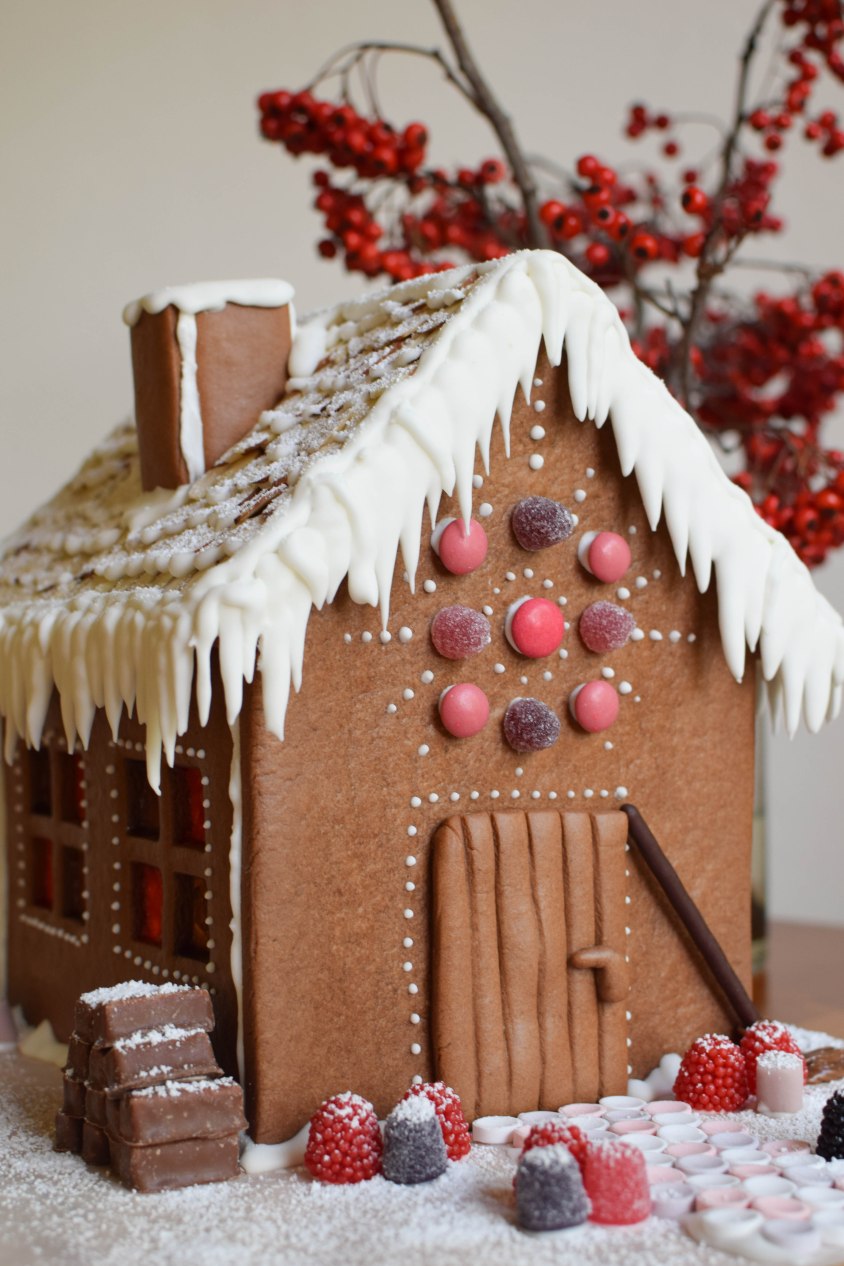
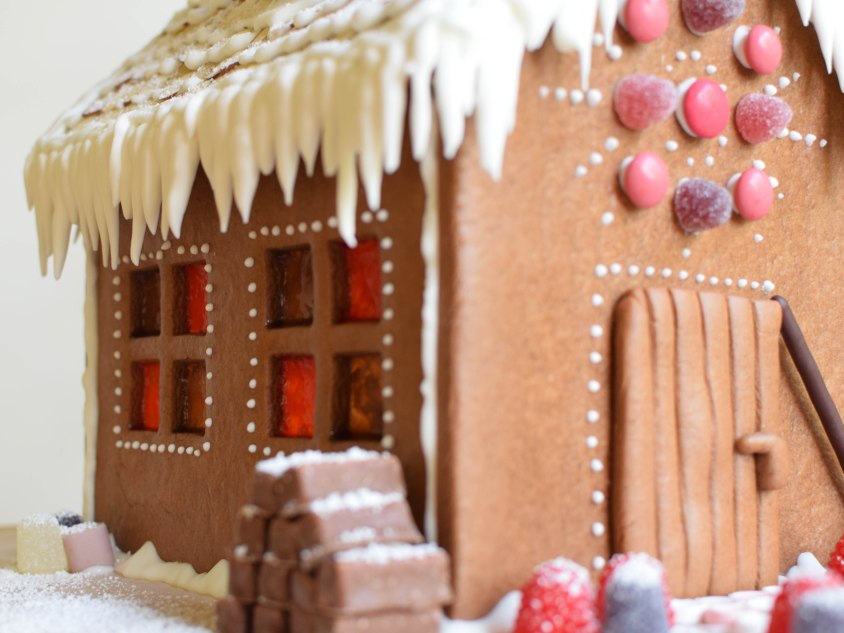
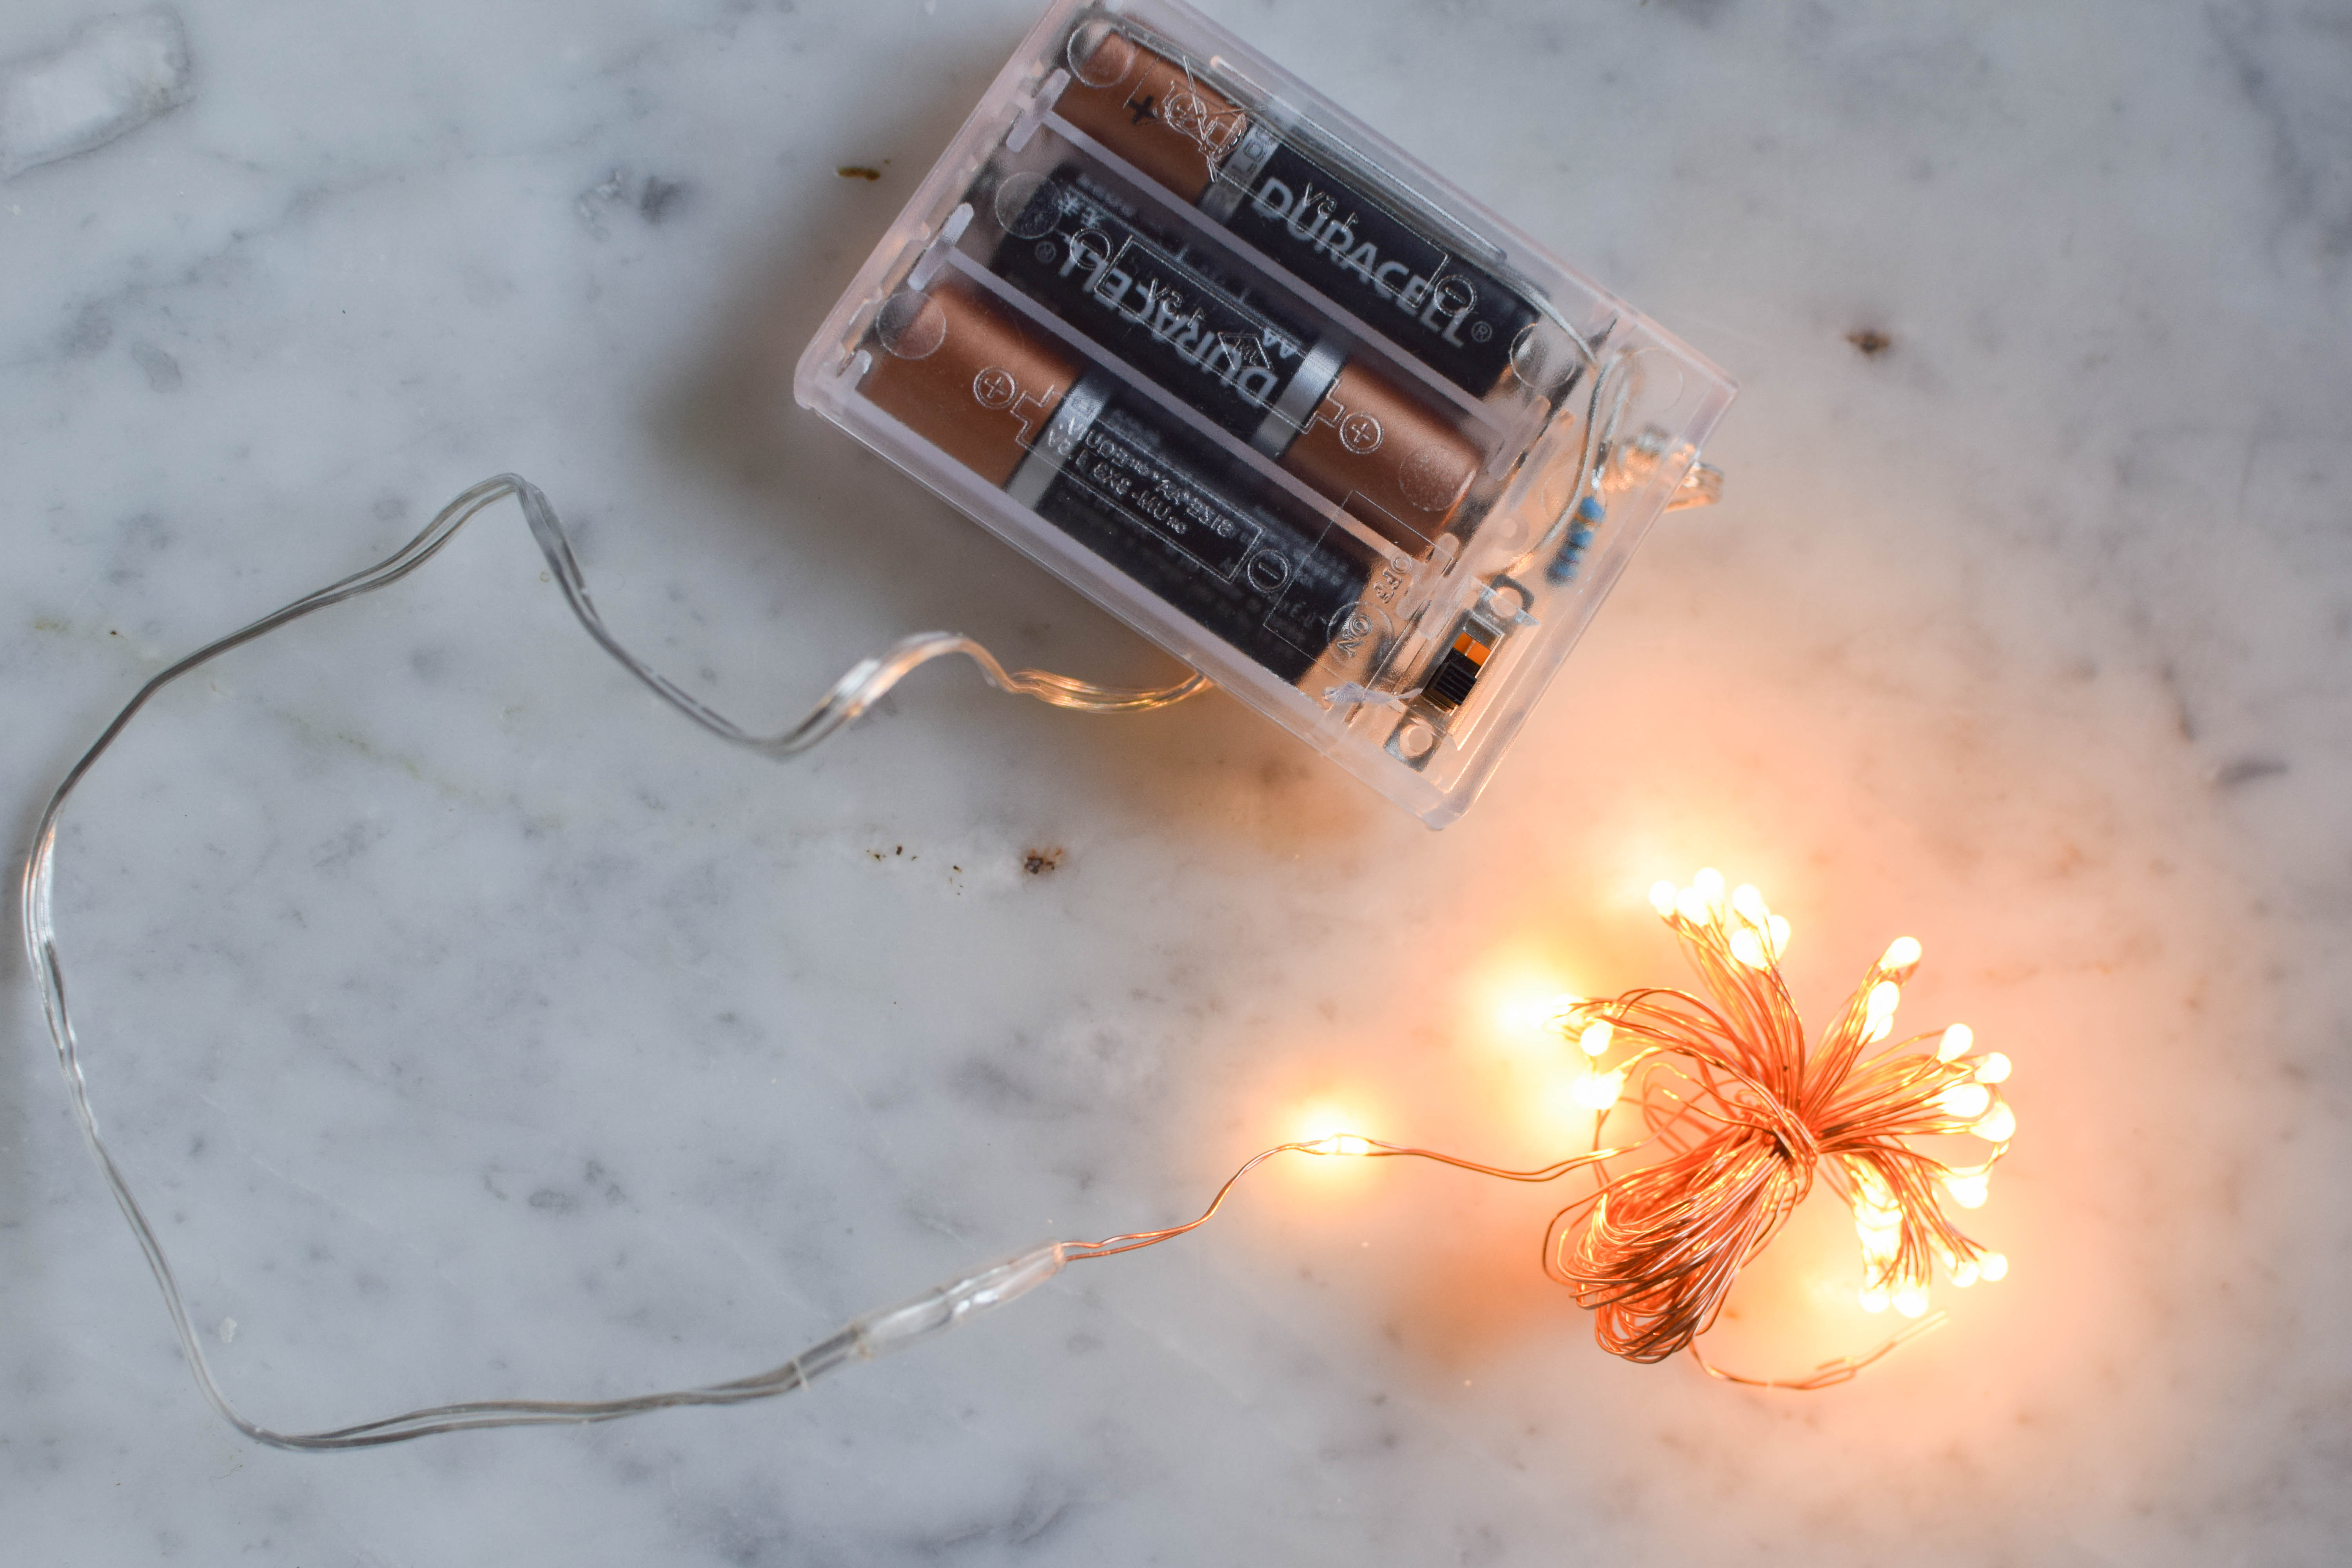
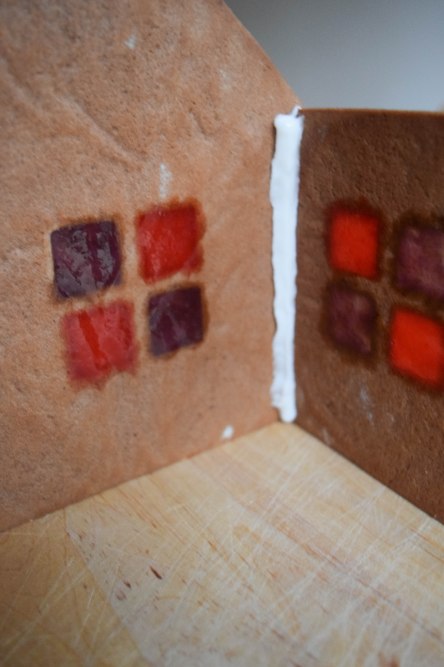
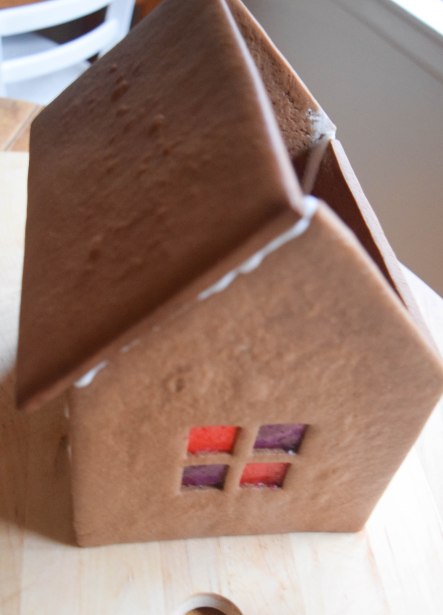
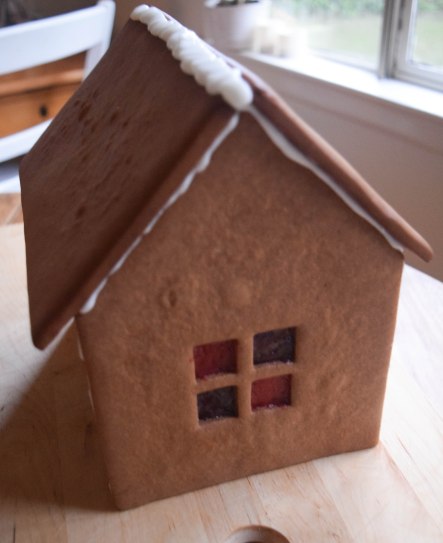
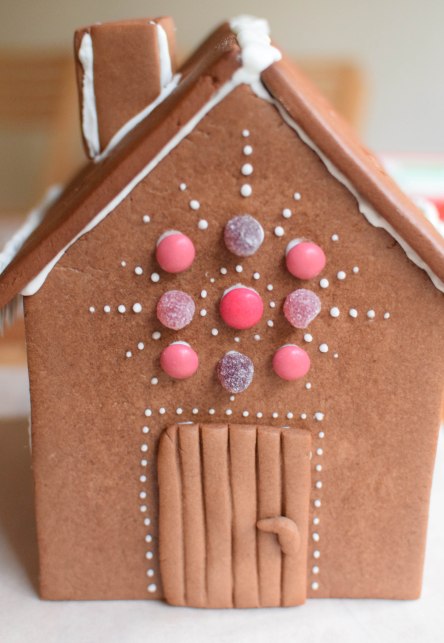
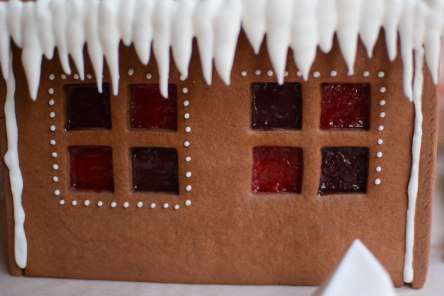
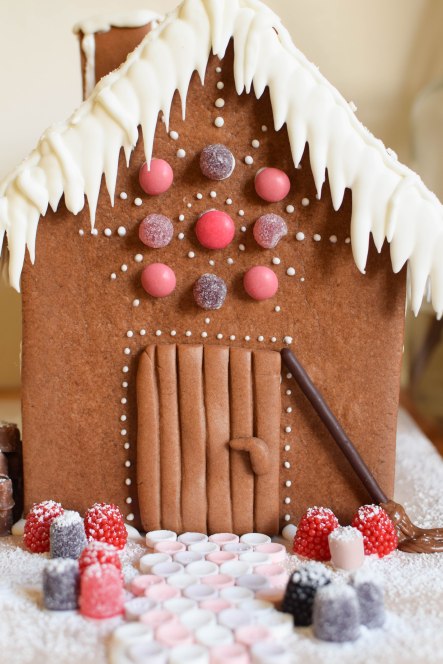
Clearly, no self-respecting witch would ever live in a house without windows, so I added “stained glass” sugar windows that can be illuminated with battery-powered LEDs.
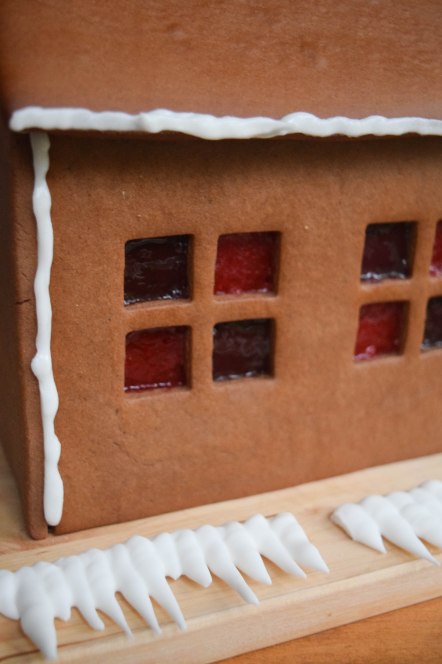
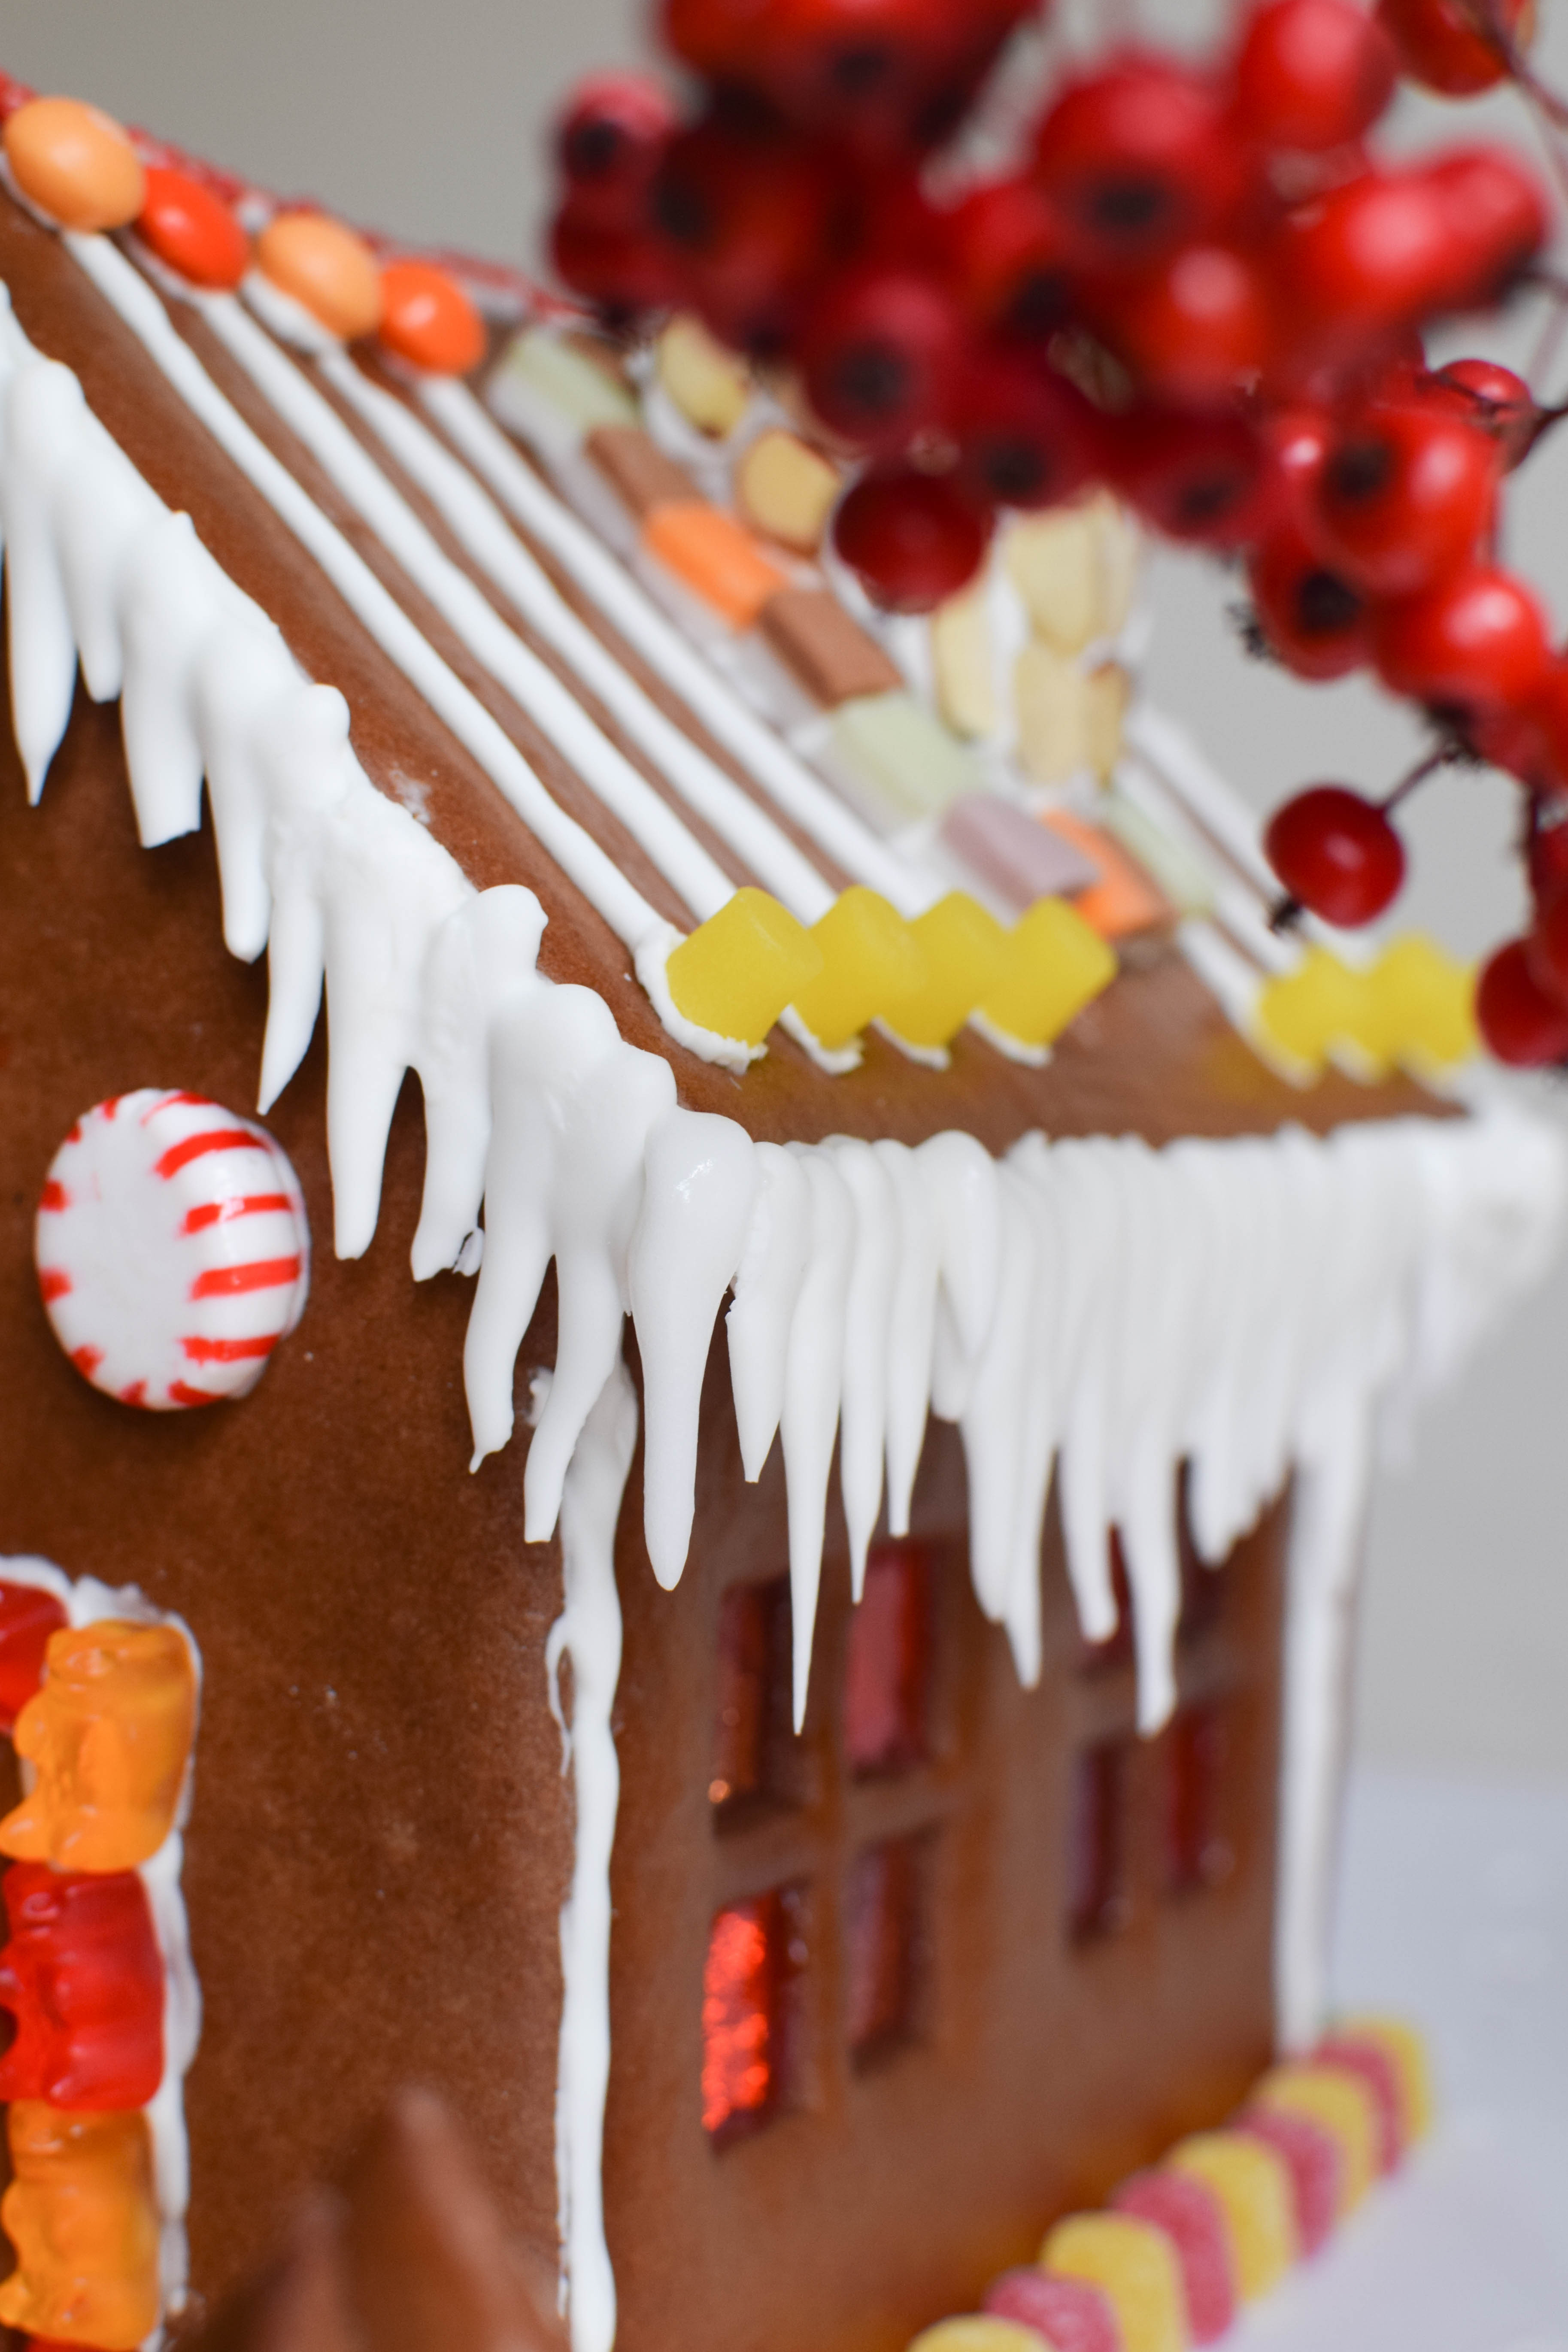
I also came up with an easy way to create perfect icicles. The result looks absolutely adorable, sends delicate wafts of gingerbread scent through your home, and tastes heavenly.
You can let your imagination run wild and add all kinds of cute details. Maybe a couple of happy little trees in the yard, some logs stacked up against the side of the house for a cozy fire (or more likely for cooking Hansel, now that I think about it)… you can make up a whole story for your little house, just dig deep and channel Bob Ross.
I even made a little broom out of a Pocky and a couple of Tootsie Rolls.

My witch cleary has a color scheme going on, but you can make your gingerbread house as colorful and unique as you want.
But before we get started on the recipe, let me offer some tips for creating your dream gingerbread house.
It’s certainly possible to make a house like this in one day, but it’s much easier if you prepare the dough the day before and let it rest in the fridge over night. Another reason to get started a day in advance is that it will give you enough time to create perfect icicles for decorating your roof.

If you were to pipe the icicles directly on the edge of the roof, they would most likely just drip off, because the icing is still wet and very heavy, and won’t set fast enough. It would be a big sticky, frustrating mess (believe me, I’ve tried it, it was heartbreaking). If you want as many long and pointy icicles as I have added on the house you see in the pictures, the secret is to pipe them onto wax paper and let them dry over night, preferably for 24 hours.
Here’s how to prepare the icicles:
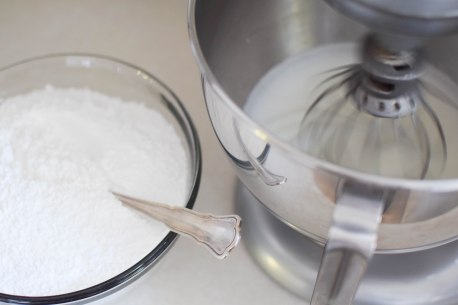
Combine egg whites and cream of tartar (see recipe below) in the bowl of a stand mixer. Adding cream of tartar is optional, but it helps to keep the egg whites from getting overbeaten. Whip the whites on slow/medium speed until they are opaque and fluffy. At that point it’s safe to crank up the speed to high. Continue whipping the egg whites until stiff peaks form.
[Tip: If you are not sure how to tell whether you have reached the stiff peaks stage or not, here’s an easy way to check: Take the whisk attachment off and turn it upside down. If the egg whites are not dripping off, but the pointy tip (the peak) is melting back into the rest of the whites on the whisk, you have soft peaks. If the peak holds and you can see more distinct ridges, but the tip folds down, you have firm peaks. If you can turn the whisk upside down and the peak and ridges hold without collapsing, you have stiff peaks. If the egg whites start to look grainy and liquid starts to separate out, they have been overbeaten and you’ll have to start over.]
Once your egg whites have reached the stiff peaks stage, turn the speed down to low and slowly start adding the powdered sugar in small portions, until it has been completely incorporated. Scrape down the sides of the bowl to make sure all the sugar gets mixed in and turn up the speed to high again for a couple of seconds. The finished icing should be very thick and smooth with a satiny sheen and it should hold firm or stiff peaks.

Fill the icing into a zipper lock type bag, remove as much of the air as possible, and seal it. Using zipper lock bags is a cheaper, mess-free alternative to standard piping bags and makes it much easier to store leftover icing or frosting.
Now line a baking sheet with wax paper. I drew lines on a sheet of parchment paper and placed it underneath the wax paper, so I could trace the lines while piping the icicles. Wax paper is thinner than parchment paper, making it easier to peel off the finished sugar icicles without breaking them, but you can also pipe them directly onto parchment paper. Remember that the icicles on the front and back of your house will need to have different angles to make them look natural. My roof has a pitch of 45 degrees, so I drew a couple of horizontal lines as well as lines at 45 degree angles in both directions.

Cut off one corner of the icing bag and pipe away. Start with a lot of pressure (squeezing out more icing) at the top of each icicle and then gradually reduce it as you are pulling the icing bag down towards yourself. To create the pointy tip, reduce the pressure completely and continue pulling the icing bag towards you, staying parallel to the baking sheet (do not pull up, or the tip of your icicle will come out crooked). It might take a couple of tries to get it just right, but don’t worry too much about the shapes. Icicles are supposed to be a bit uneven.
When you’re done, fold over the corner of the icing bag with the hole and close it with a little clamp (I use a lot of bulldog clips like the one in the picture below in my kitchen). Place the bag in the fridge until you are ready to assemble your ginger bread house.

Place the baking sheet in a warm, dry place to let the icicles set. When they have hardened completely, you can carefully peel them off.

Don’t worry if some of them break apart, you can still use the smaller pieces and cover up the cracks with more icing after you have attached them to the roof.
Now let’s get started on the actual gingerbread house!

Here’s what you’ll need:
Equipment:
- paper or cardstock for making templates
- board or large platter to build the house on
- battery-powered LEDs
For the dough:
- 16 ounces honey
- 7 ounces dark brown sugar
- 7 ounces butter
- 4 tablespoons water
- 2 teaspoons salt
- 27 ounces all purpose flour (plus extra for rolling the dough)
- 1.5 ounces unsweetened cocoa powder
- 2 teaspoons baking powder
- 2 teaspoons ground ginger
- 1 teaspoon cinnamon
- 1/2 teaspoon ground cloves
- 1/2 teaspoon ground star anise
- about 2 tablespoons milk
For the windows:
- translucent hard candies (unfilled, such as Jolly Ranchers)
For the icing:
- 3 egg whites
- 18 ounces powdered sugar
- 3/8 teaspoon cream of tartar
Decorations:
- candy and cookies your choice, such as gummi bears, gum drops, m&ms, nuts, etc.
The day before:
- Combine egg whites and cream of tartar. Beat whites on low/medium speed until they are opaque and fluffy.
- Increase speed to high and continue beating until stiff peaks form.
- Reduce speed. Add powdered sugar in small portions until all of the sugar has been incorporated.
- Pipe icicles on baking sheet lined with wax paper. Set aside to dry.

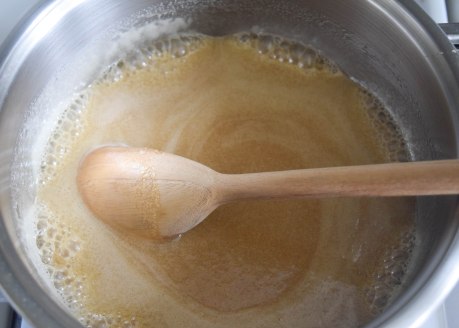
- In a large saucepan, combine honey, butter, brown sugar, salt, and water.
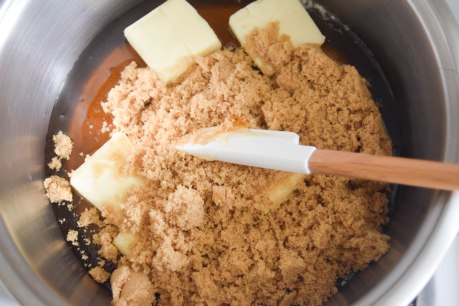
- Bring to a boil, stirring occassionally. The mixture will bubble up, so make sure you have a couple of inches of space in the saucepan. Set aside to cool for about 1 hour.
- In a large bowl, combine flour, cocoa powder, baking powder, and spices.
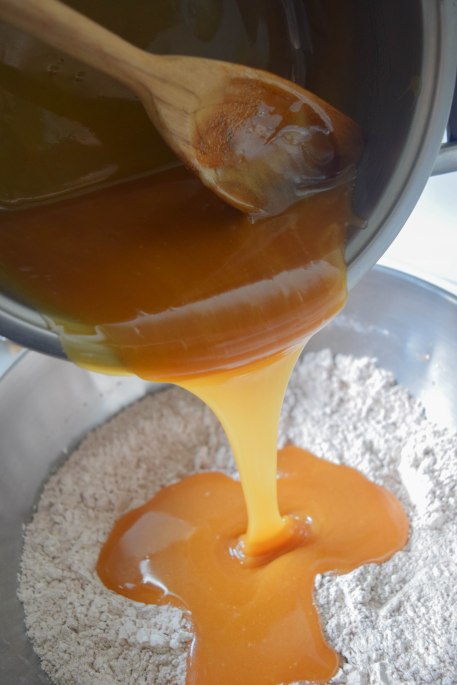
- When the honey caramel mixture has cooled down enough that it is safe to touch, add it to the dry ingredients. (Solids from the butter will have formed a foamy layer on top, just give it a good stir before you add it to the flour mixture.)
- Using a wooden spoon or spatula, stir the mixture until it starts to come together.
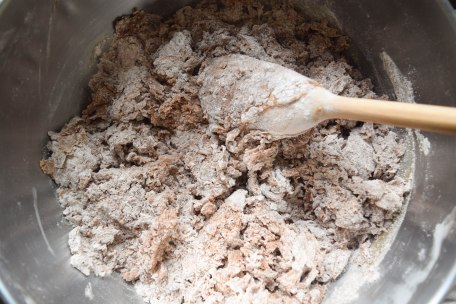
- Using your hands or a stand mixer with a dough hook, continue kneading until a cohesive dough forms.
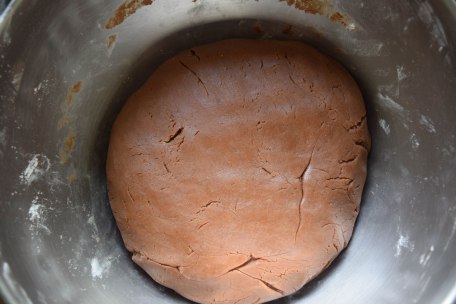
- Wrap the dough in plastic wrap and transfer it to the fridge to rest over night (minimum 2 hours, up to 2 days).
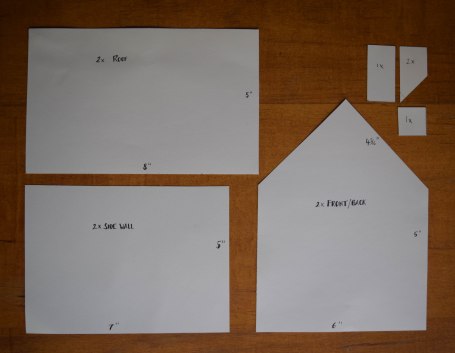
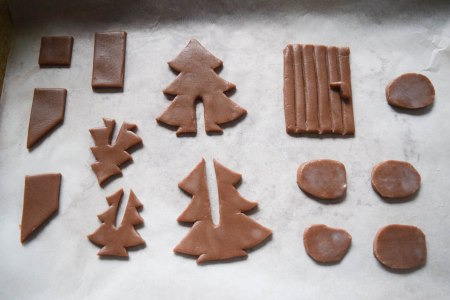
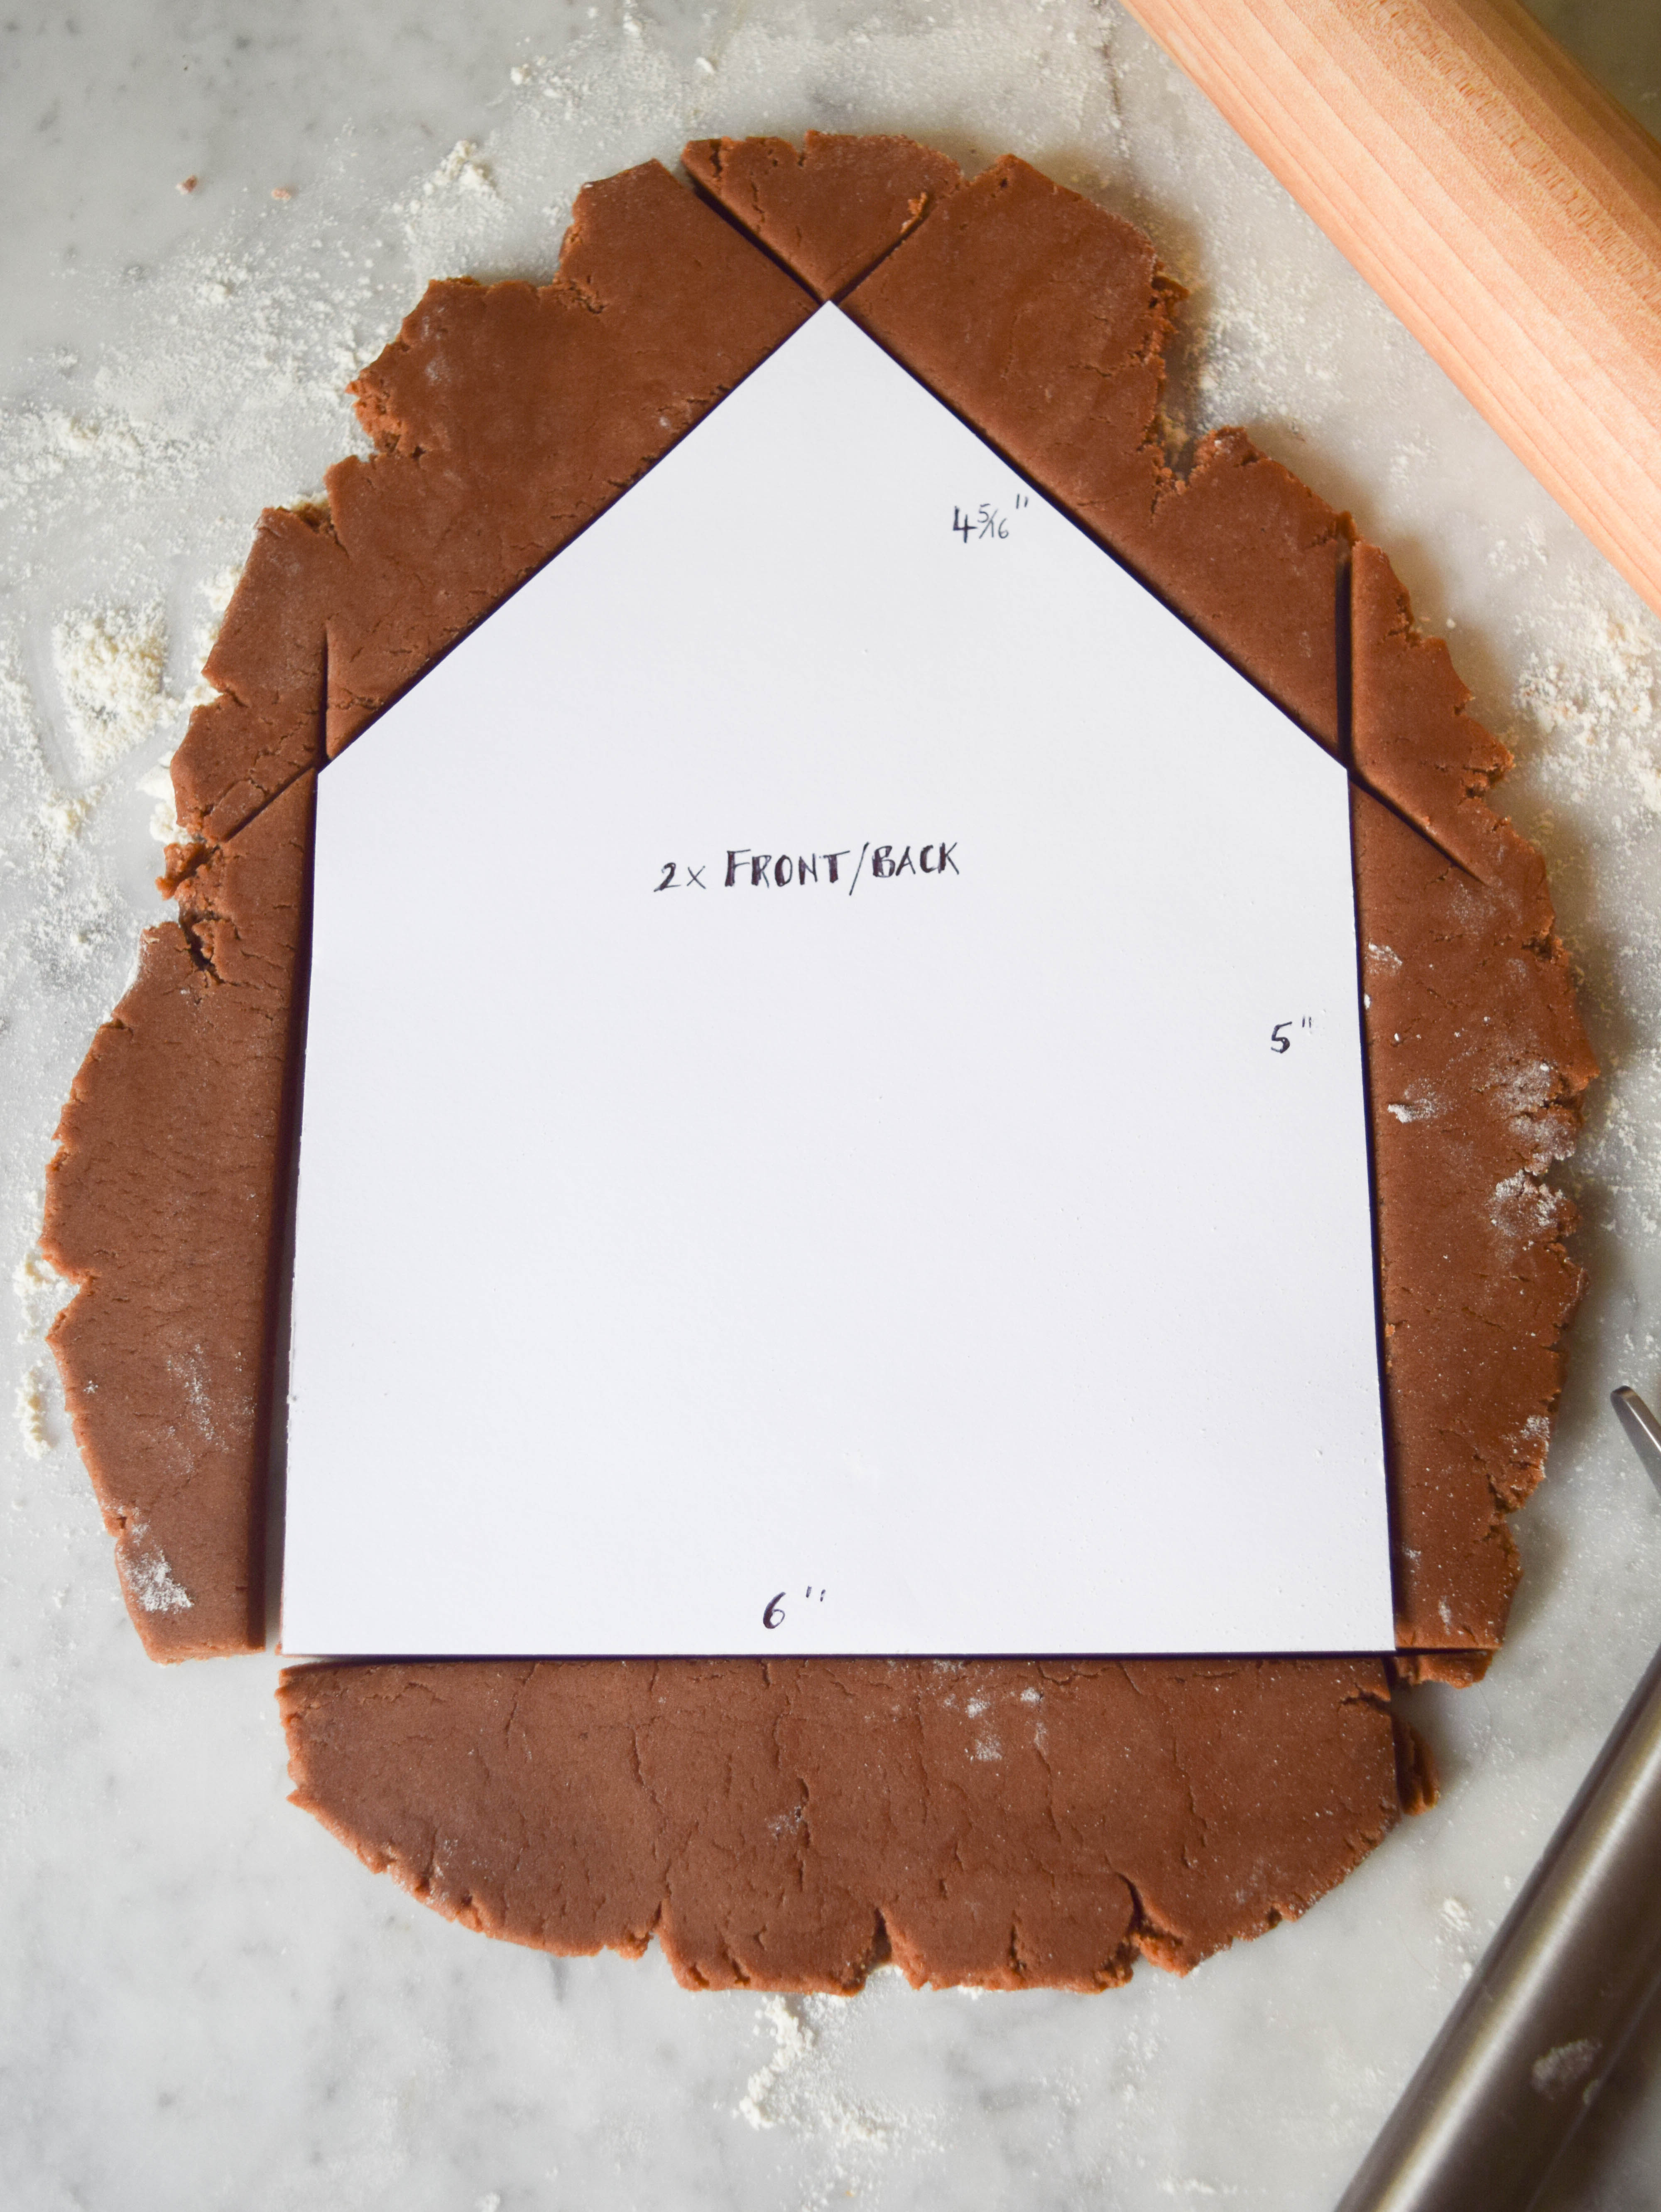
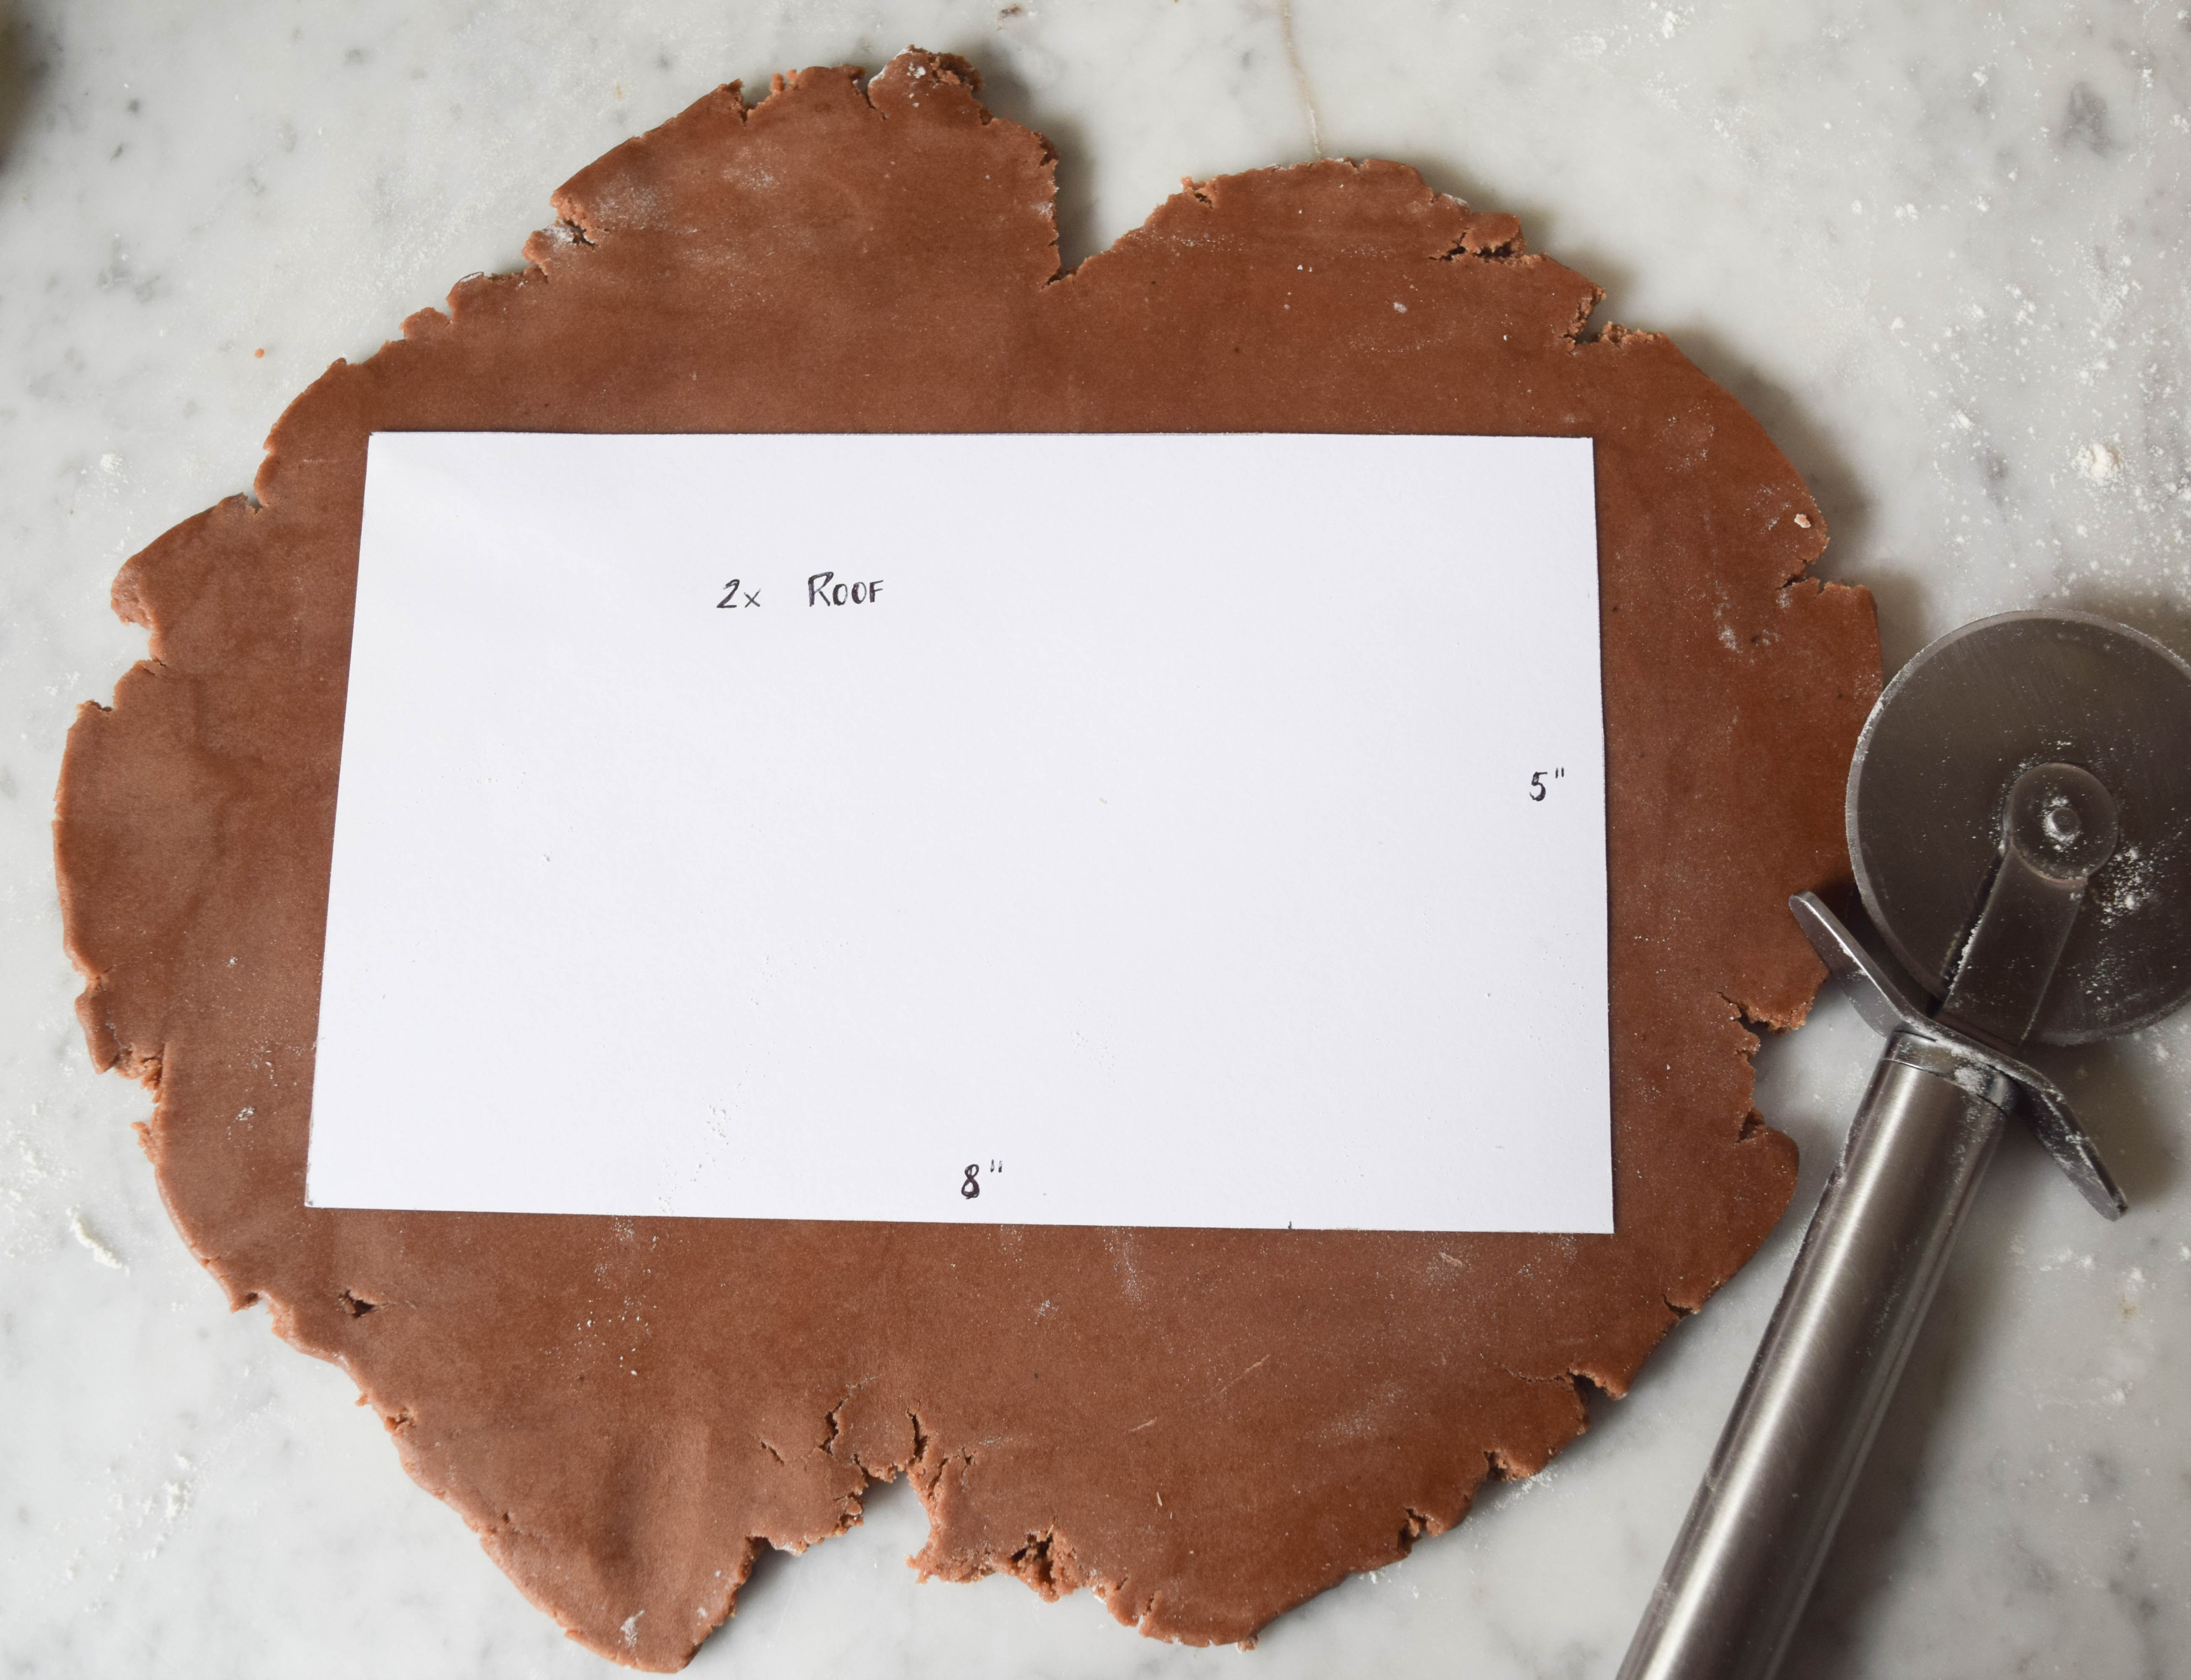
- Prepare the templates for your house. You will need 1 template for the roof, one for the front/back of the house, and one for the sides. You can also create templates for trees, a chimney, etc.


On baking day:
- Preheat oven to 350°F.
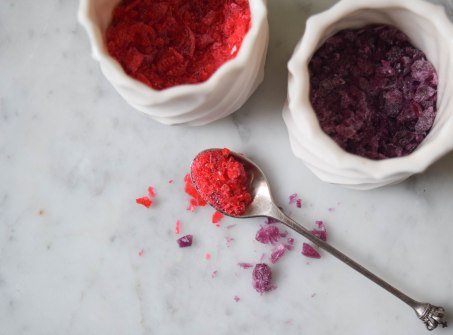
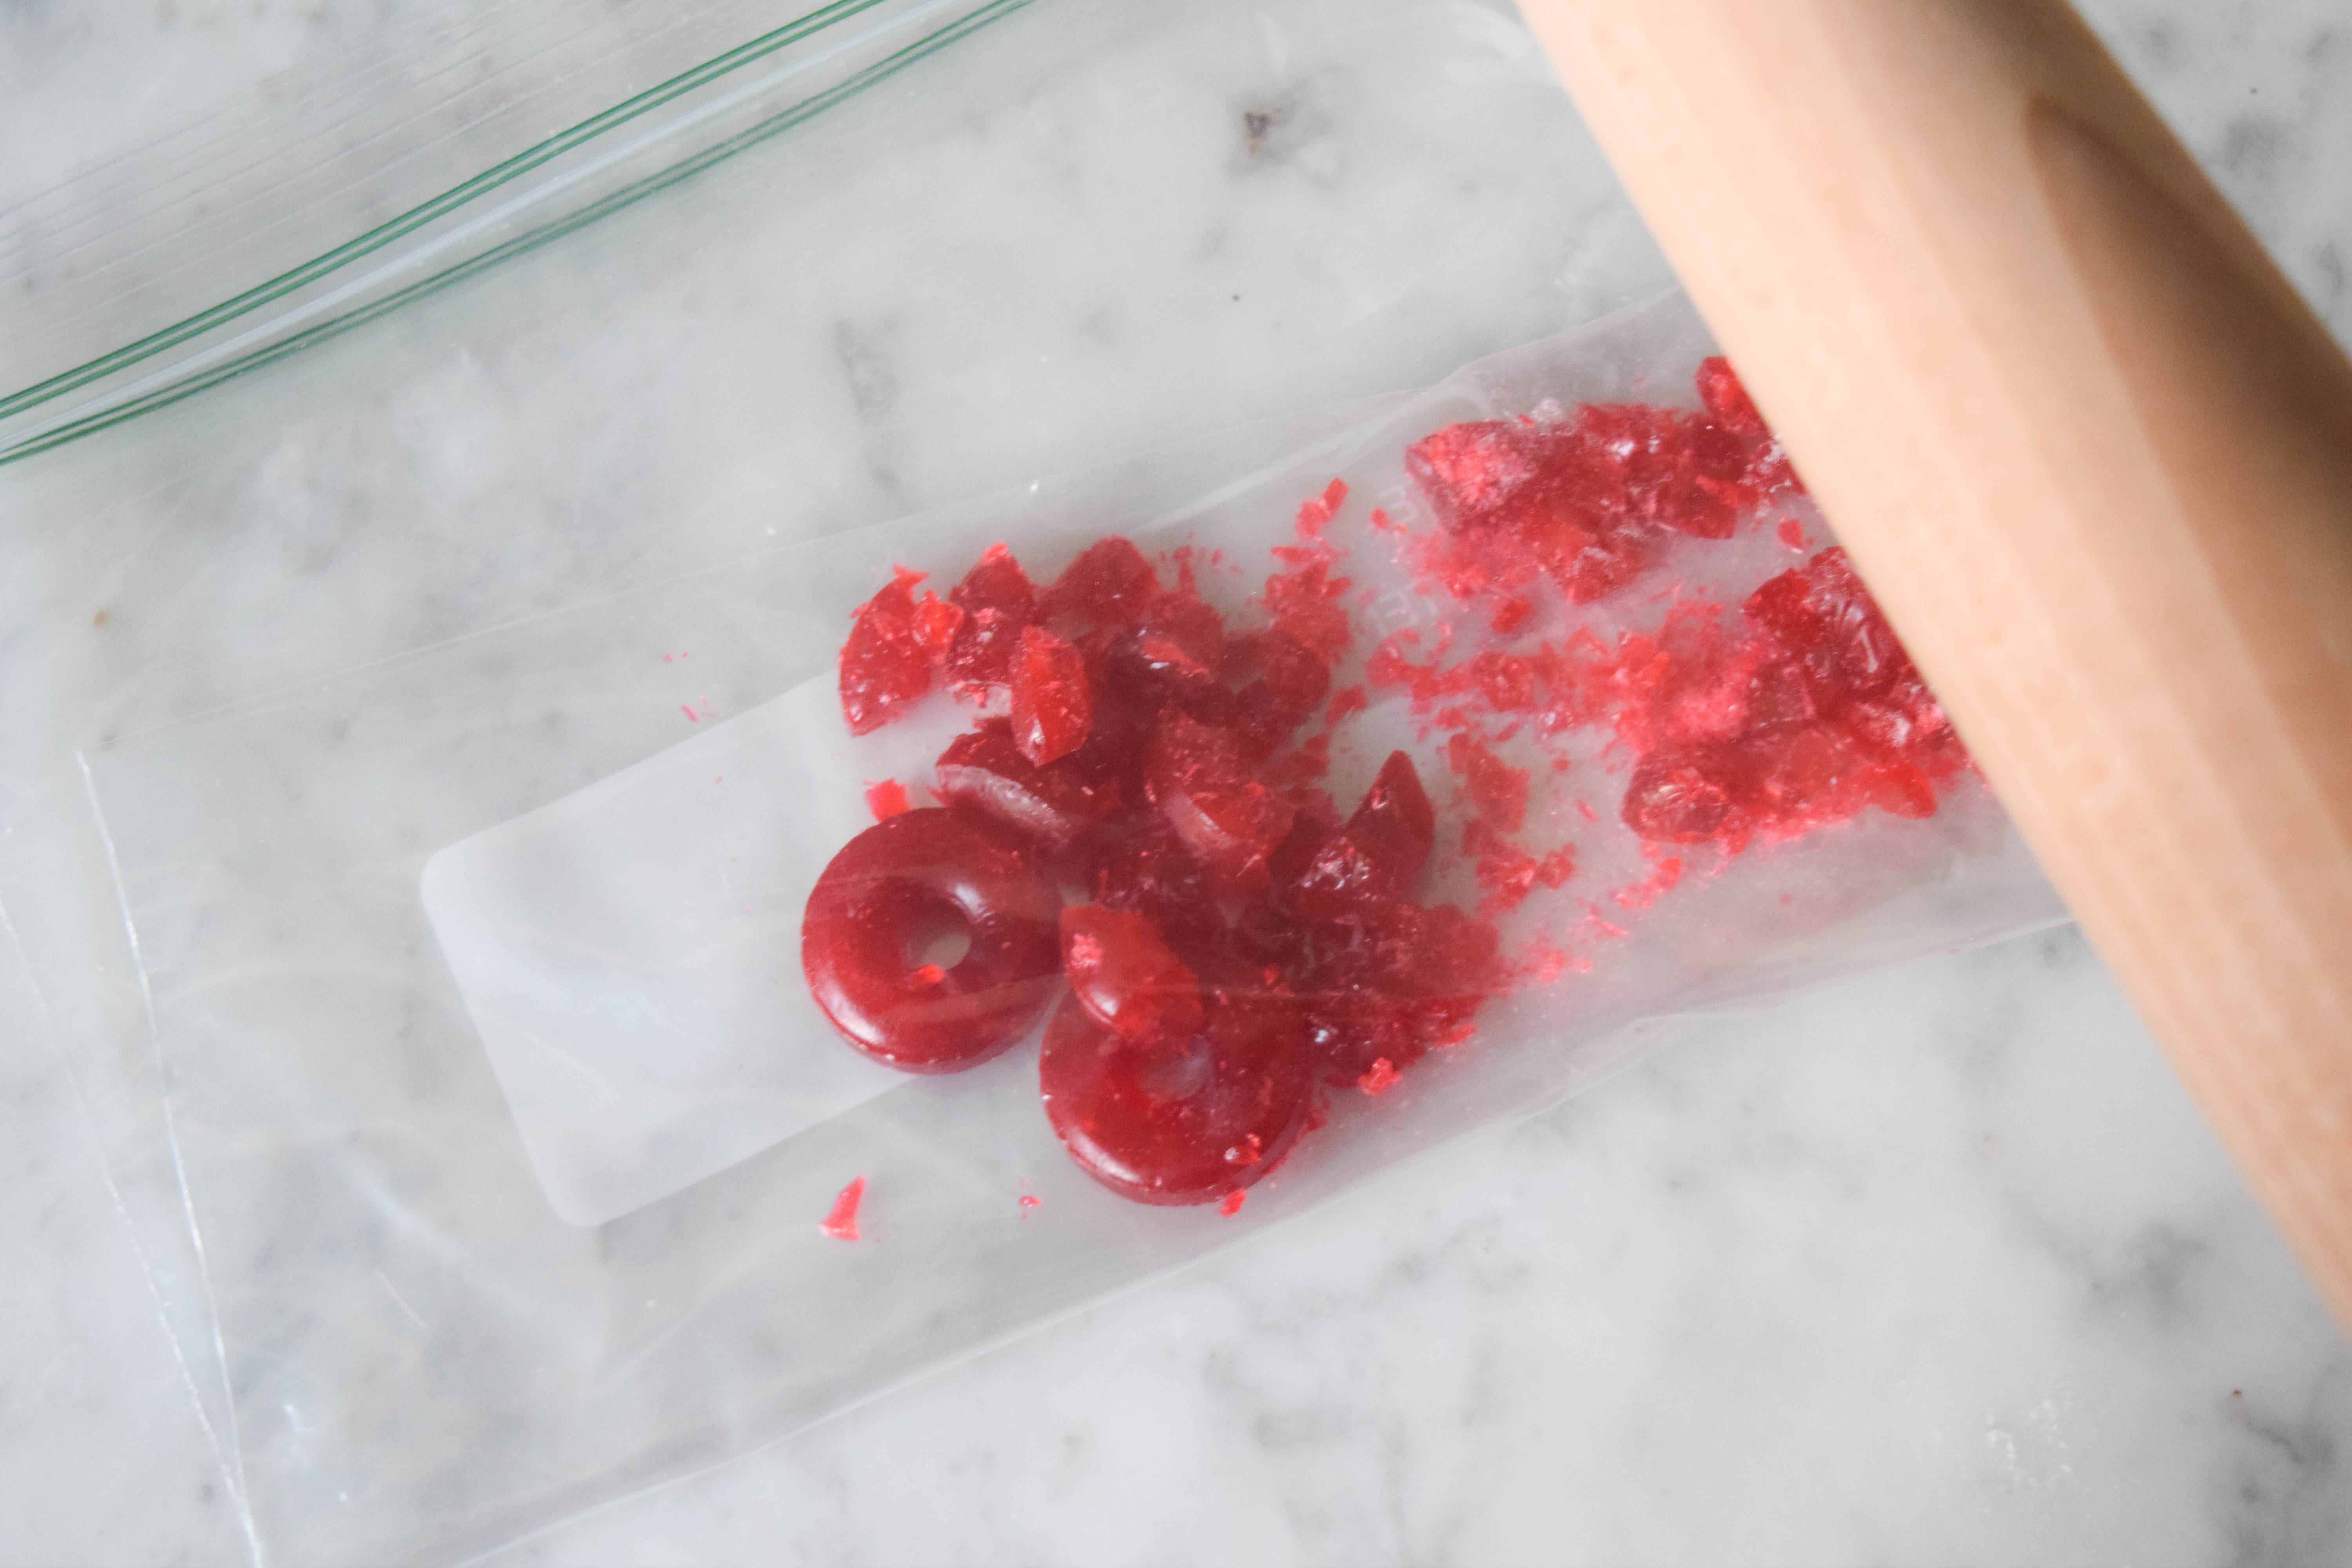
- Place hard candies in freezer bags and finely crush them with a rolling pin (depending on the type of candy, it will take a couple of really good whacks). Set aside. [Note: I used LifeSavers for the windows in this gingerbread house and Jolly Ranchers when I made more houses for a gingerbread house decorating party with my friends. The Jolly Rancher windows came out more evenly and were more translucent, so I would recommend going with those.]

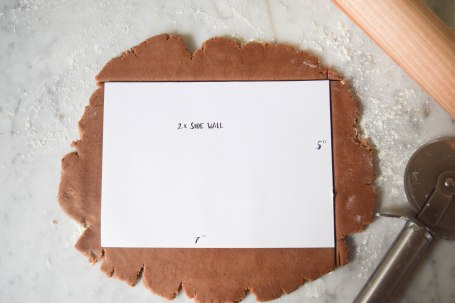
- Working in batches, roll out the dough on a floured countertop to a thickness of about 1/4 inch.
- Using your template and a pastry cutter or a sharp knife, cut out the two side walls.
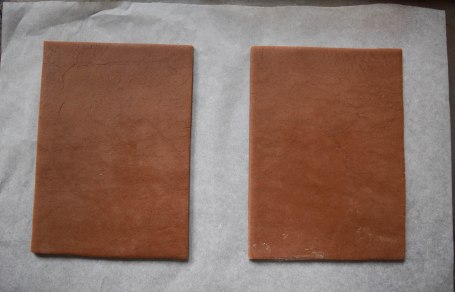
- Carefully transfer them to a baking sheet lined with parchment paper.
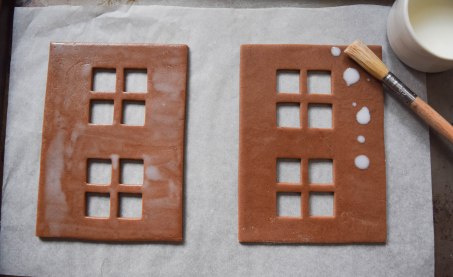
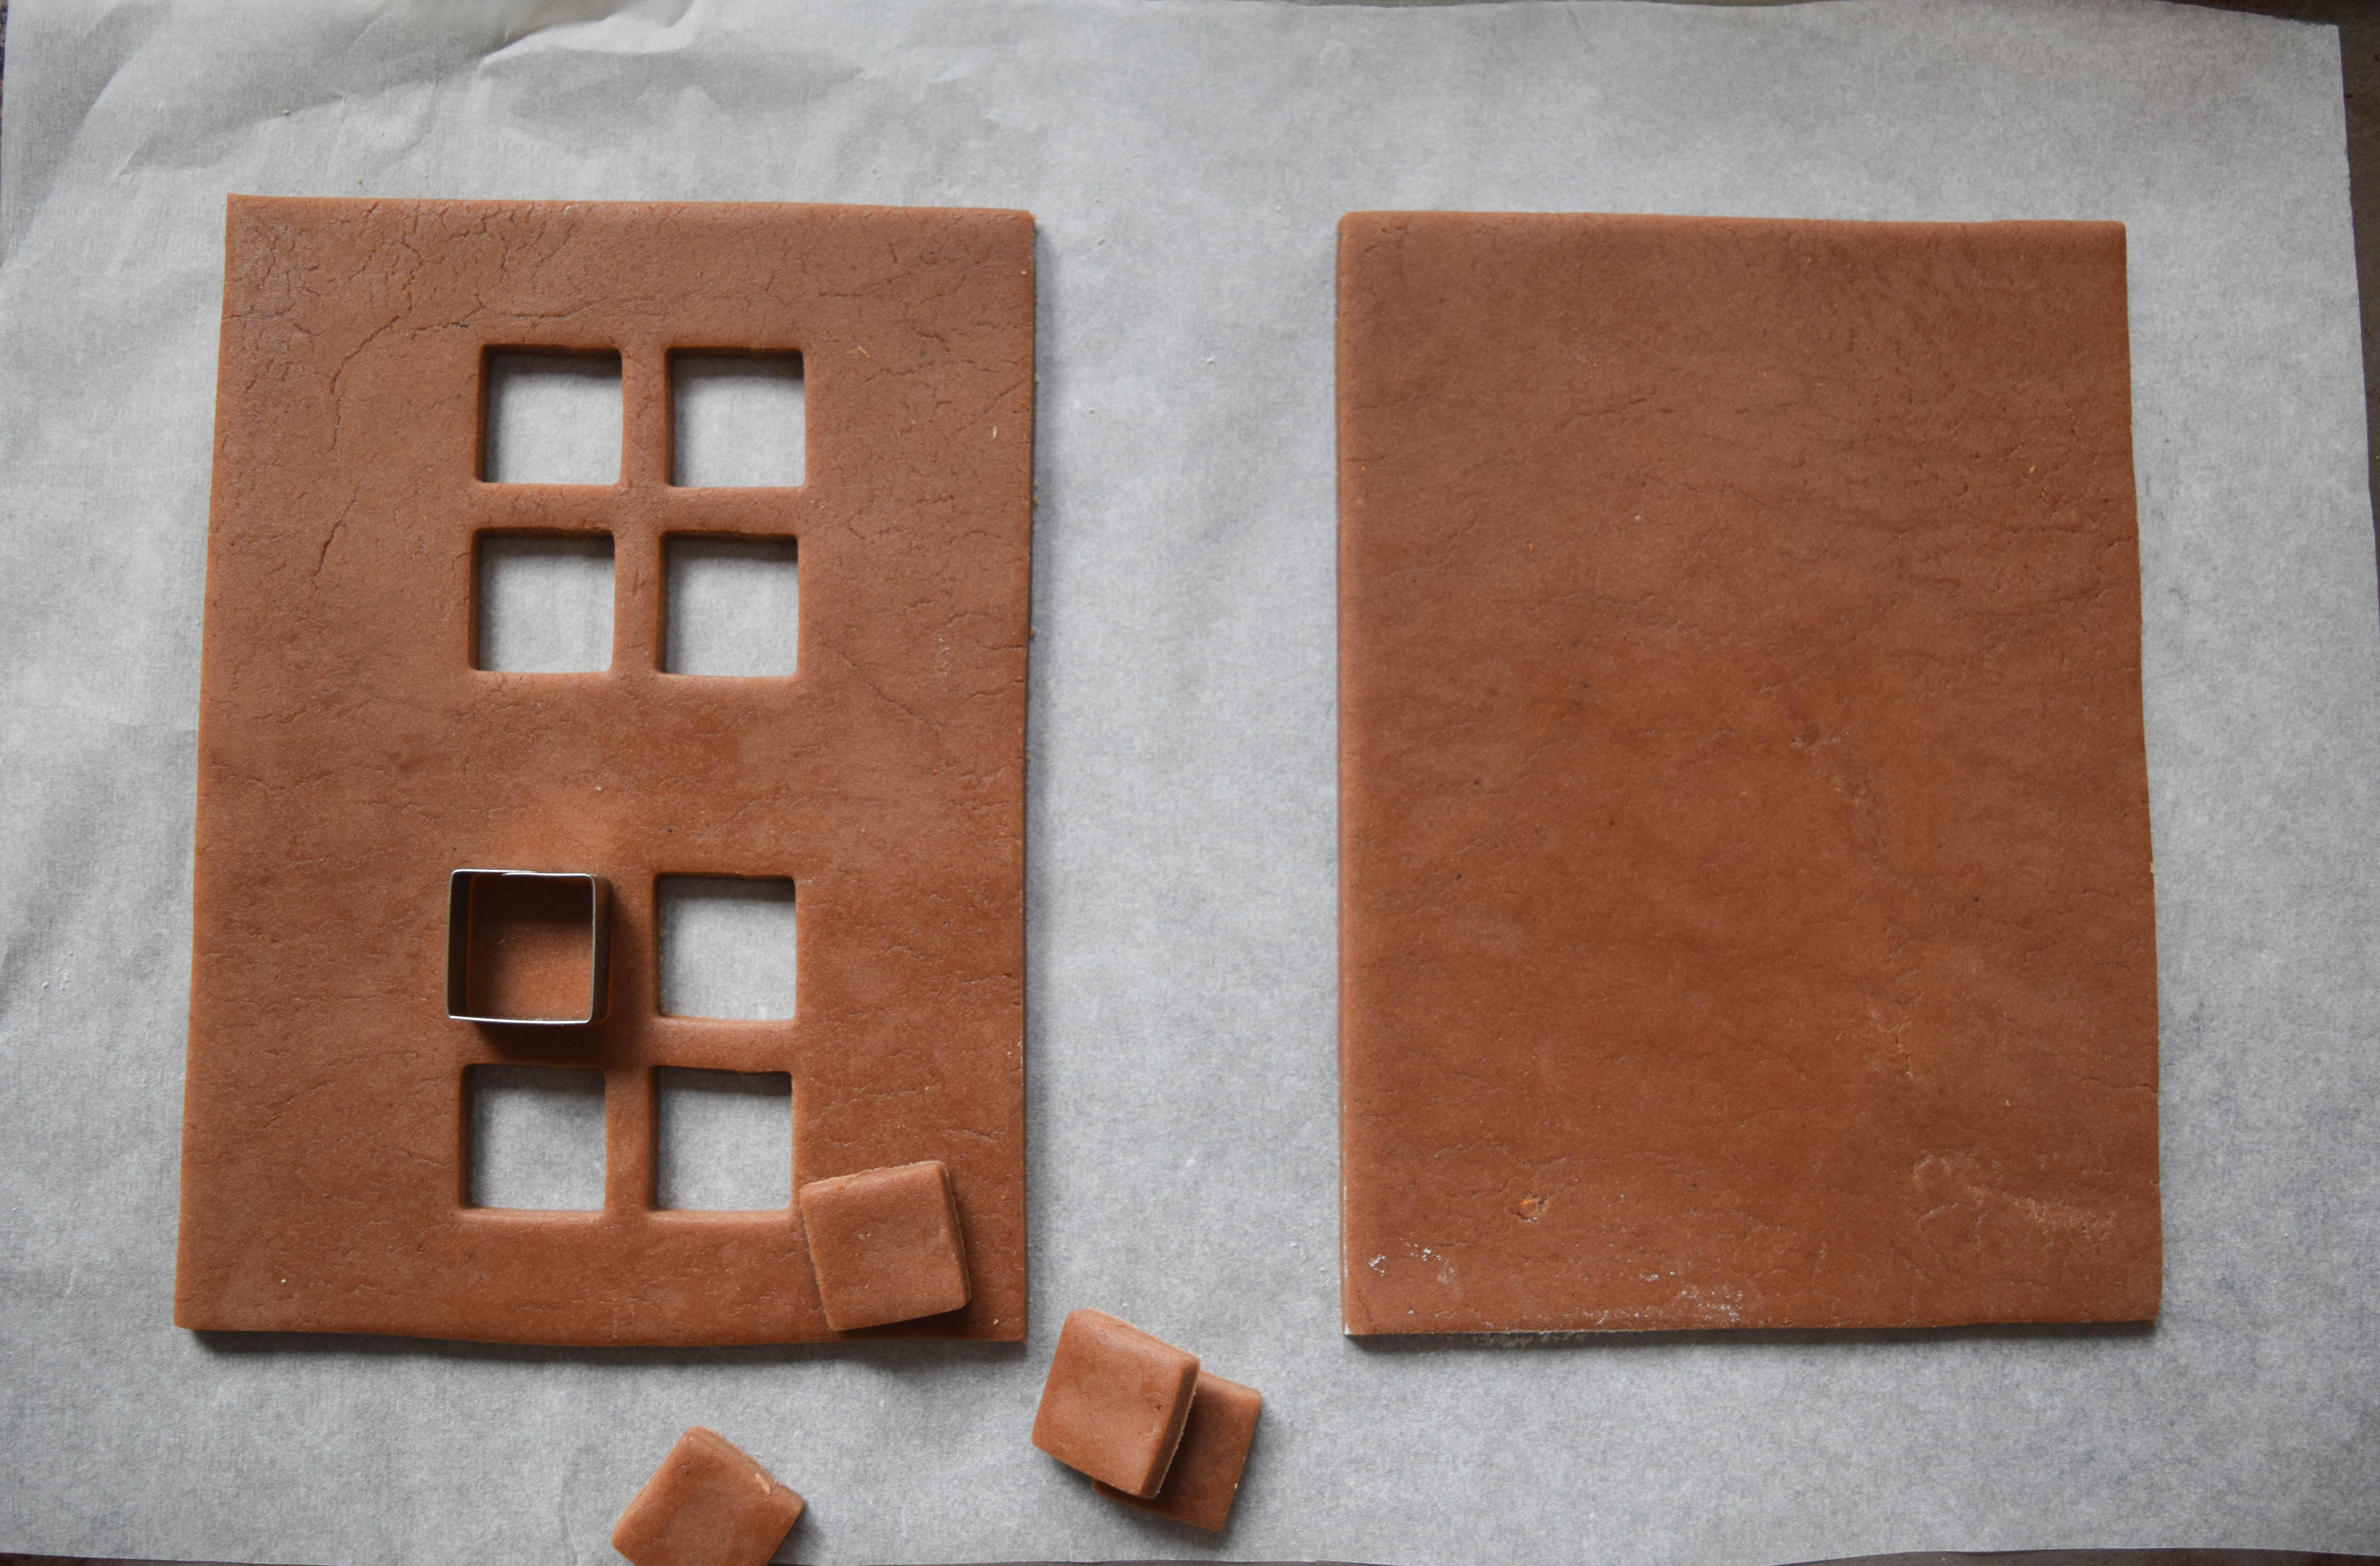
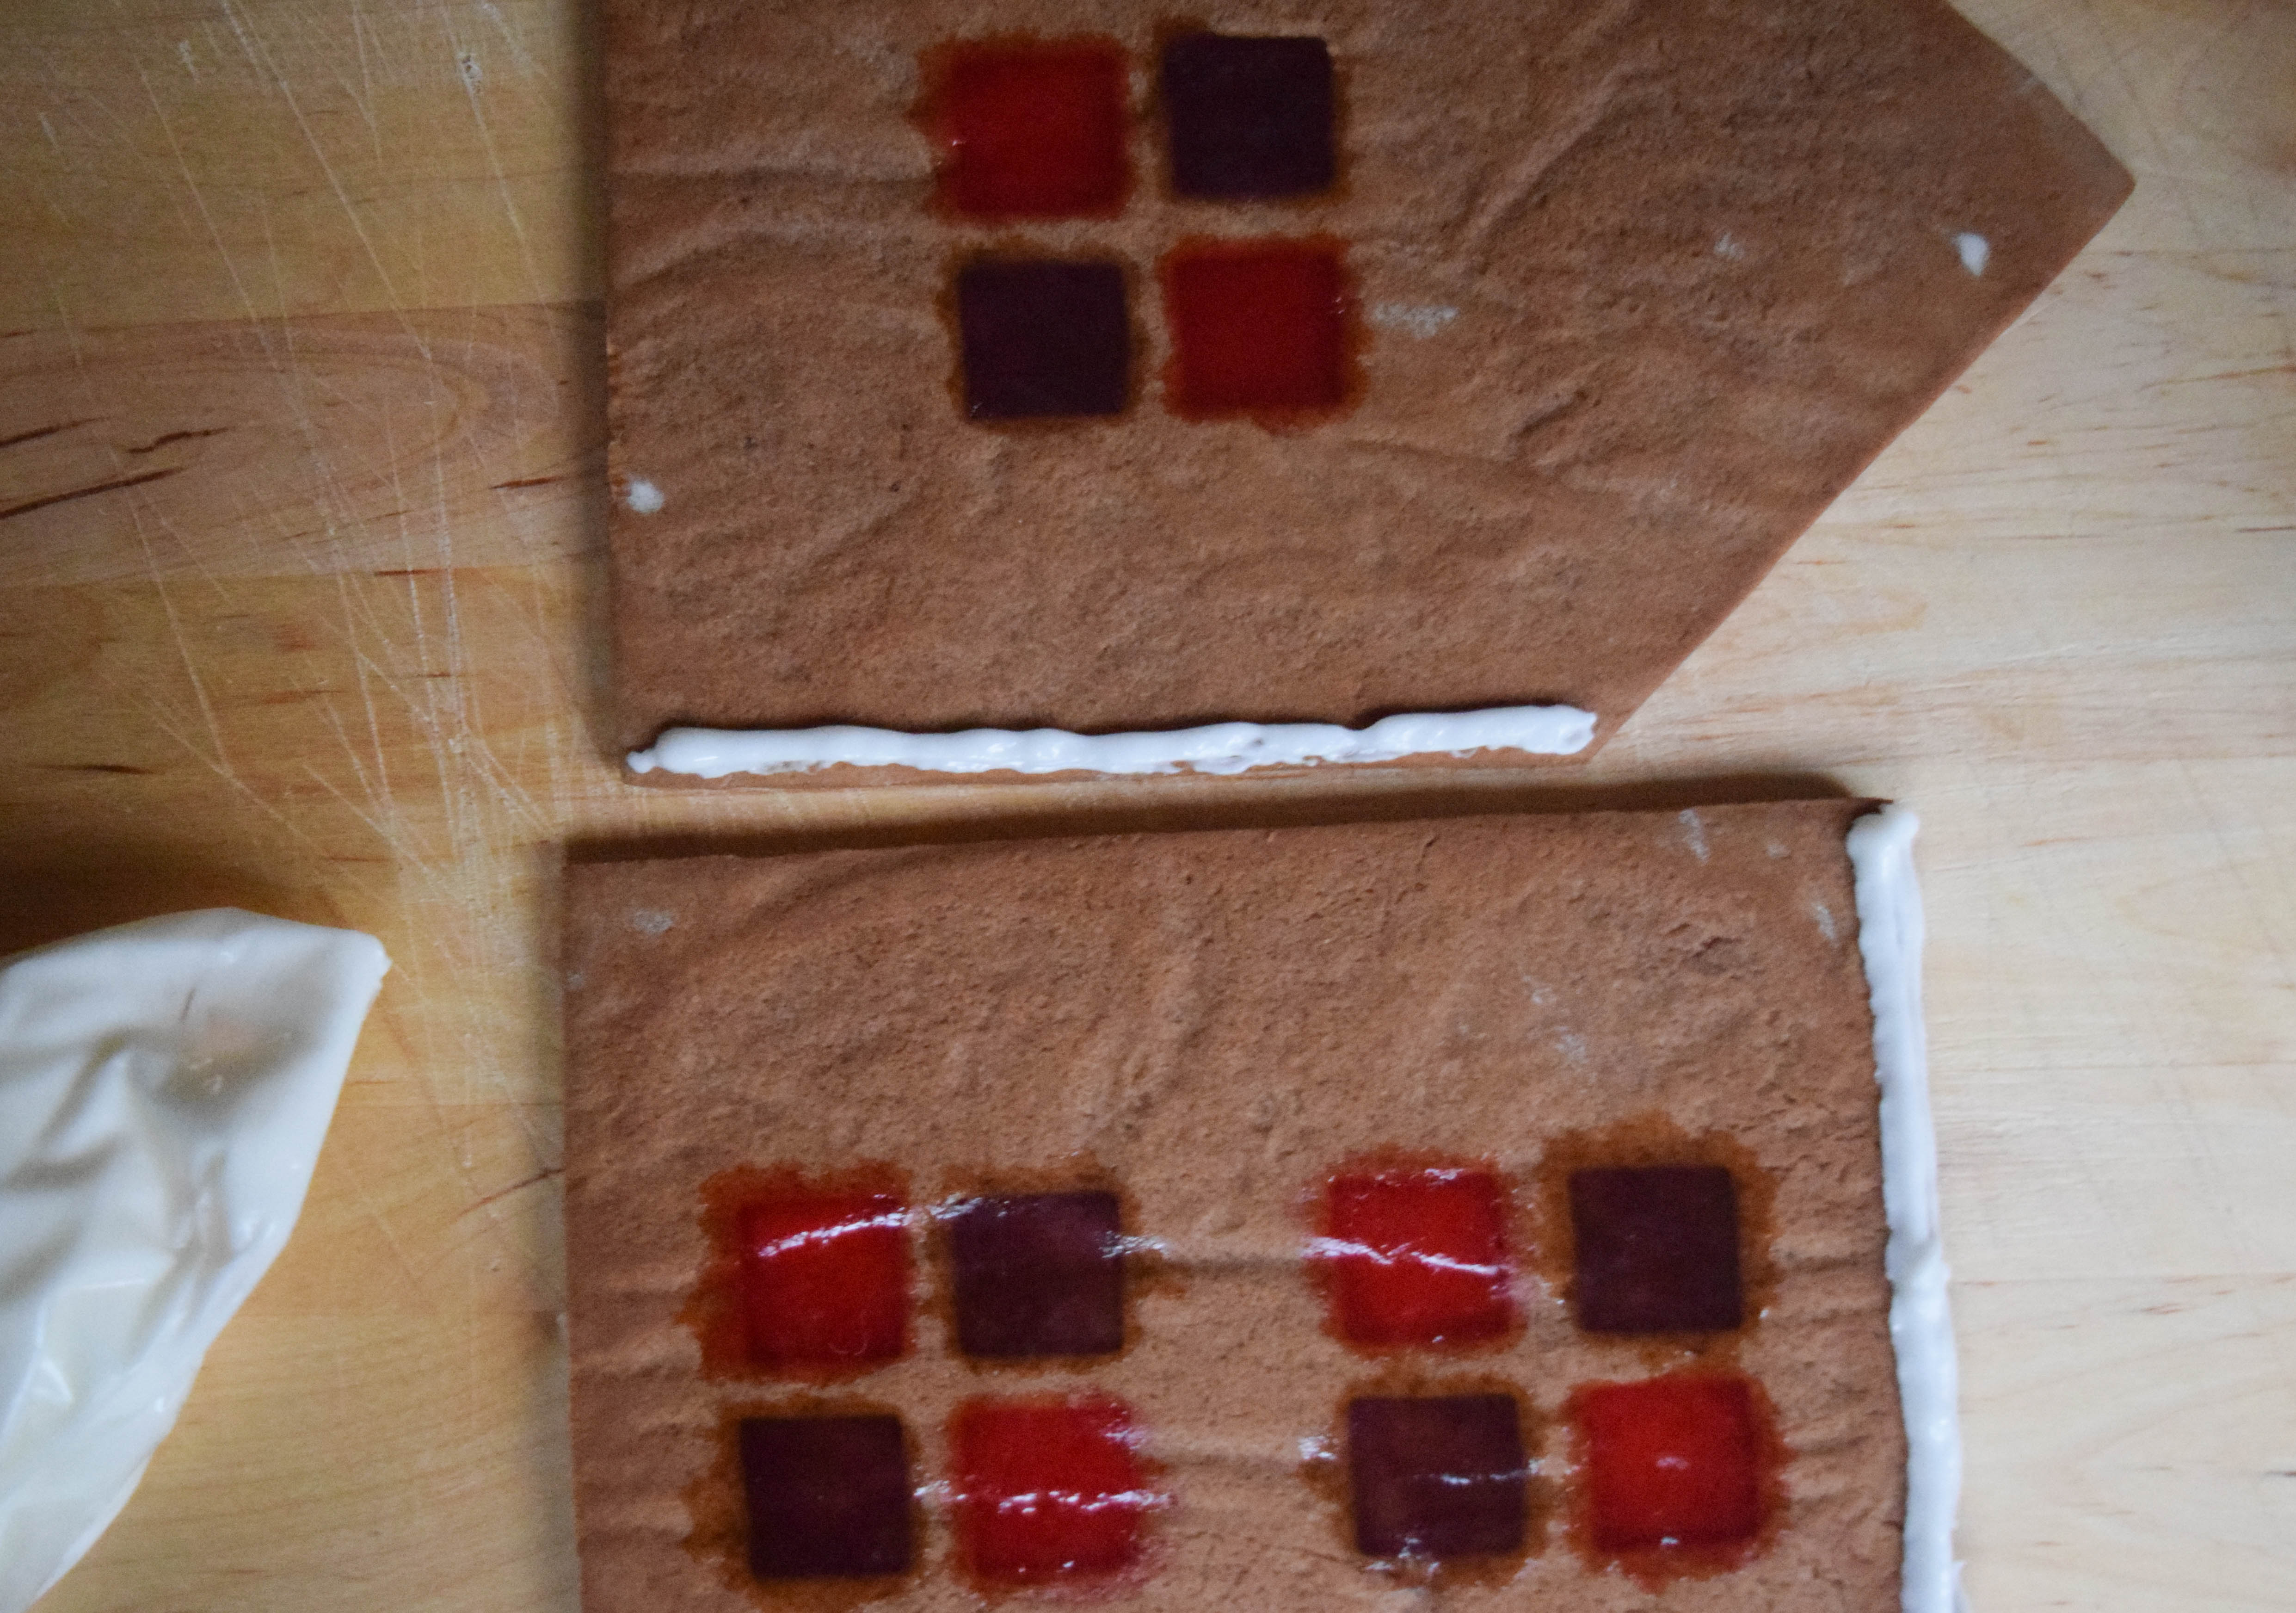
- Using a cookie cutter or a knife, cut out the windows.

- Using a pastry brush, gently brush the dough with milk. Transfer to the oven and bake at 350°F for about 12 minutes.
- In the meantime, get the crushed candy and a small spoon ready.
- Remove the side walls from the oven and fill the window openings with crushed candy.
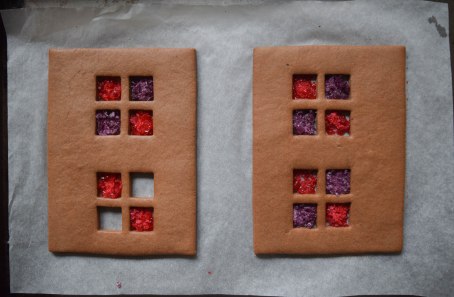
- Return to the oven until the candy has melted, about 3 minutes. If the sugar does not melt all the way to the edges or if there are any holes, use a toothpick or skewer to close them before it hardens. Transfer the walls to a cooling rack (leaving them on the parchment paper). The dough will still seem quite soft, but it firms up significantly when it cools down. Once the walls have cooled completely, carefully peel off the parchment paper.
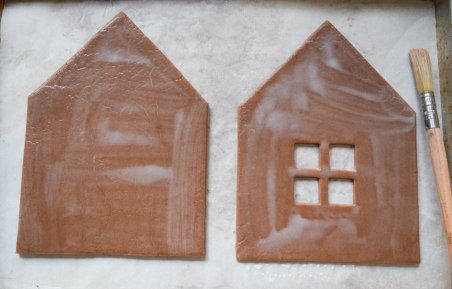
- Roll out more dough and cut out the front and back of the house.

- Transfer to a baking sheet lined with parchment paper, add any windows, and brush with milk.
- Bake for 12 minutes, add crushed candy to the windows, return to the oven and continue baking for about 3 minutes. Transfer to a cooling rack and let cool completely.
- Cut out the two sides of the roof, brush them with milk, and bake at 350°F for about 15 minutes.

- Now it’s time to make any small pieces you would like to add. In my case it was a chimney and a door, as well as couple of trees and some stepping stones (which I ended up not using). Be creative!

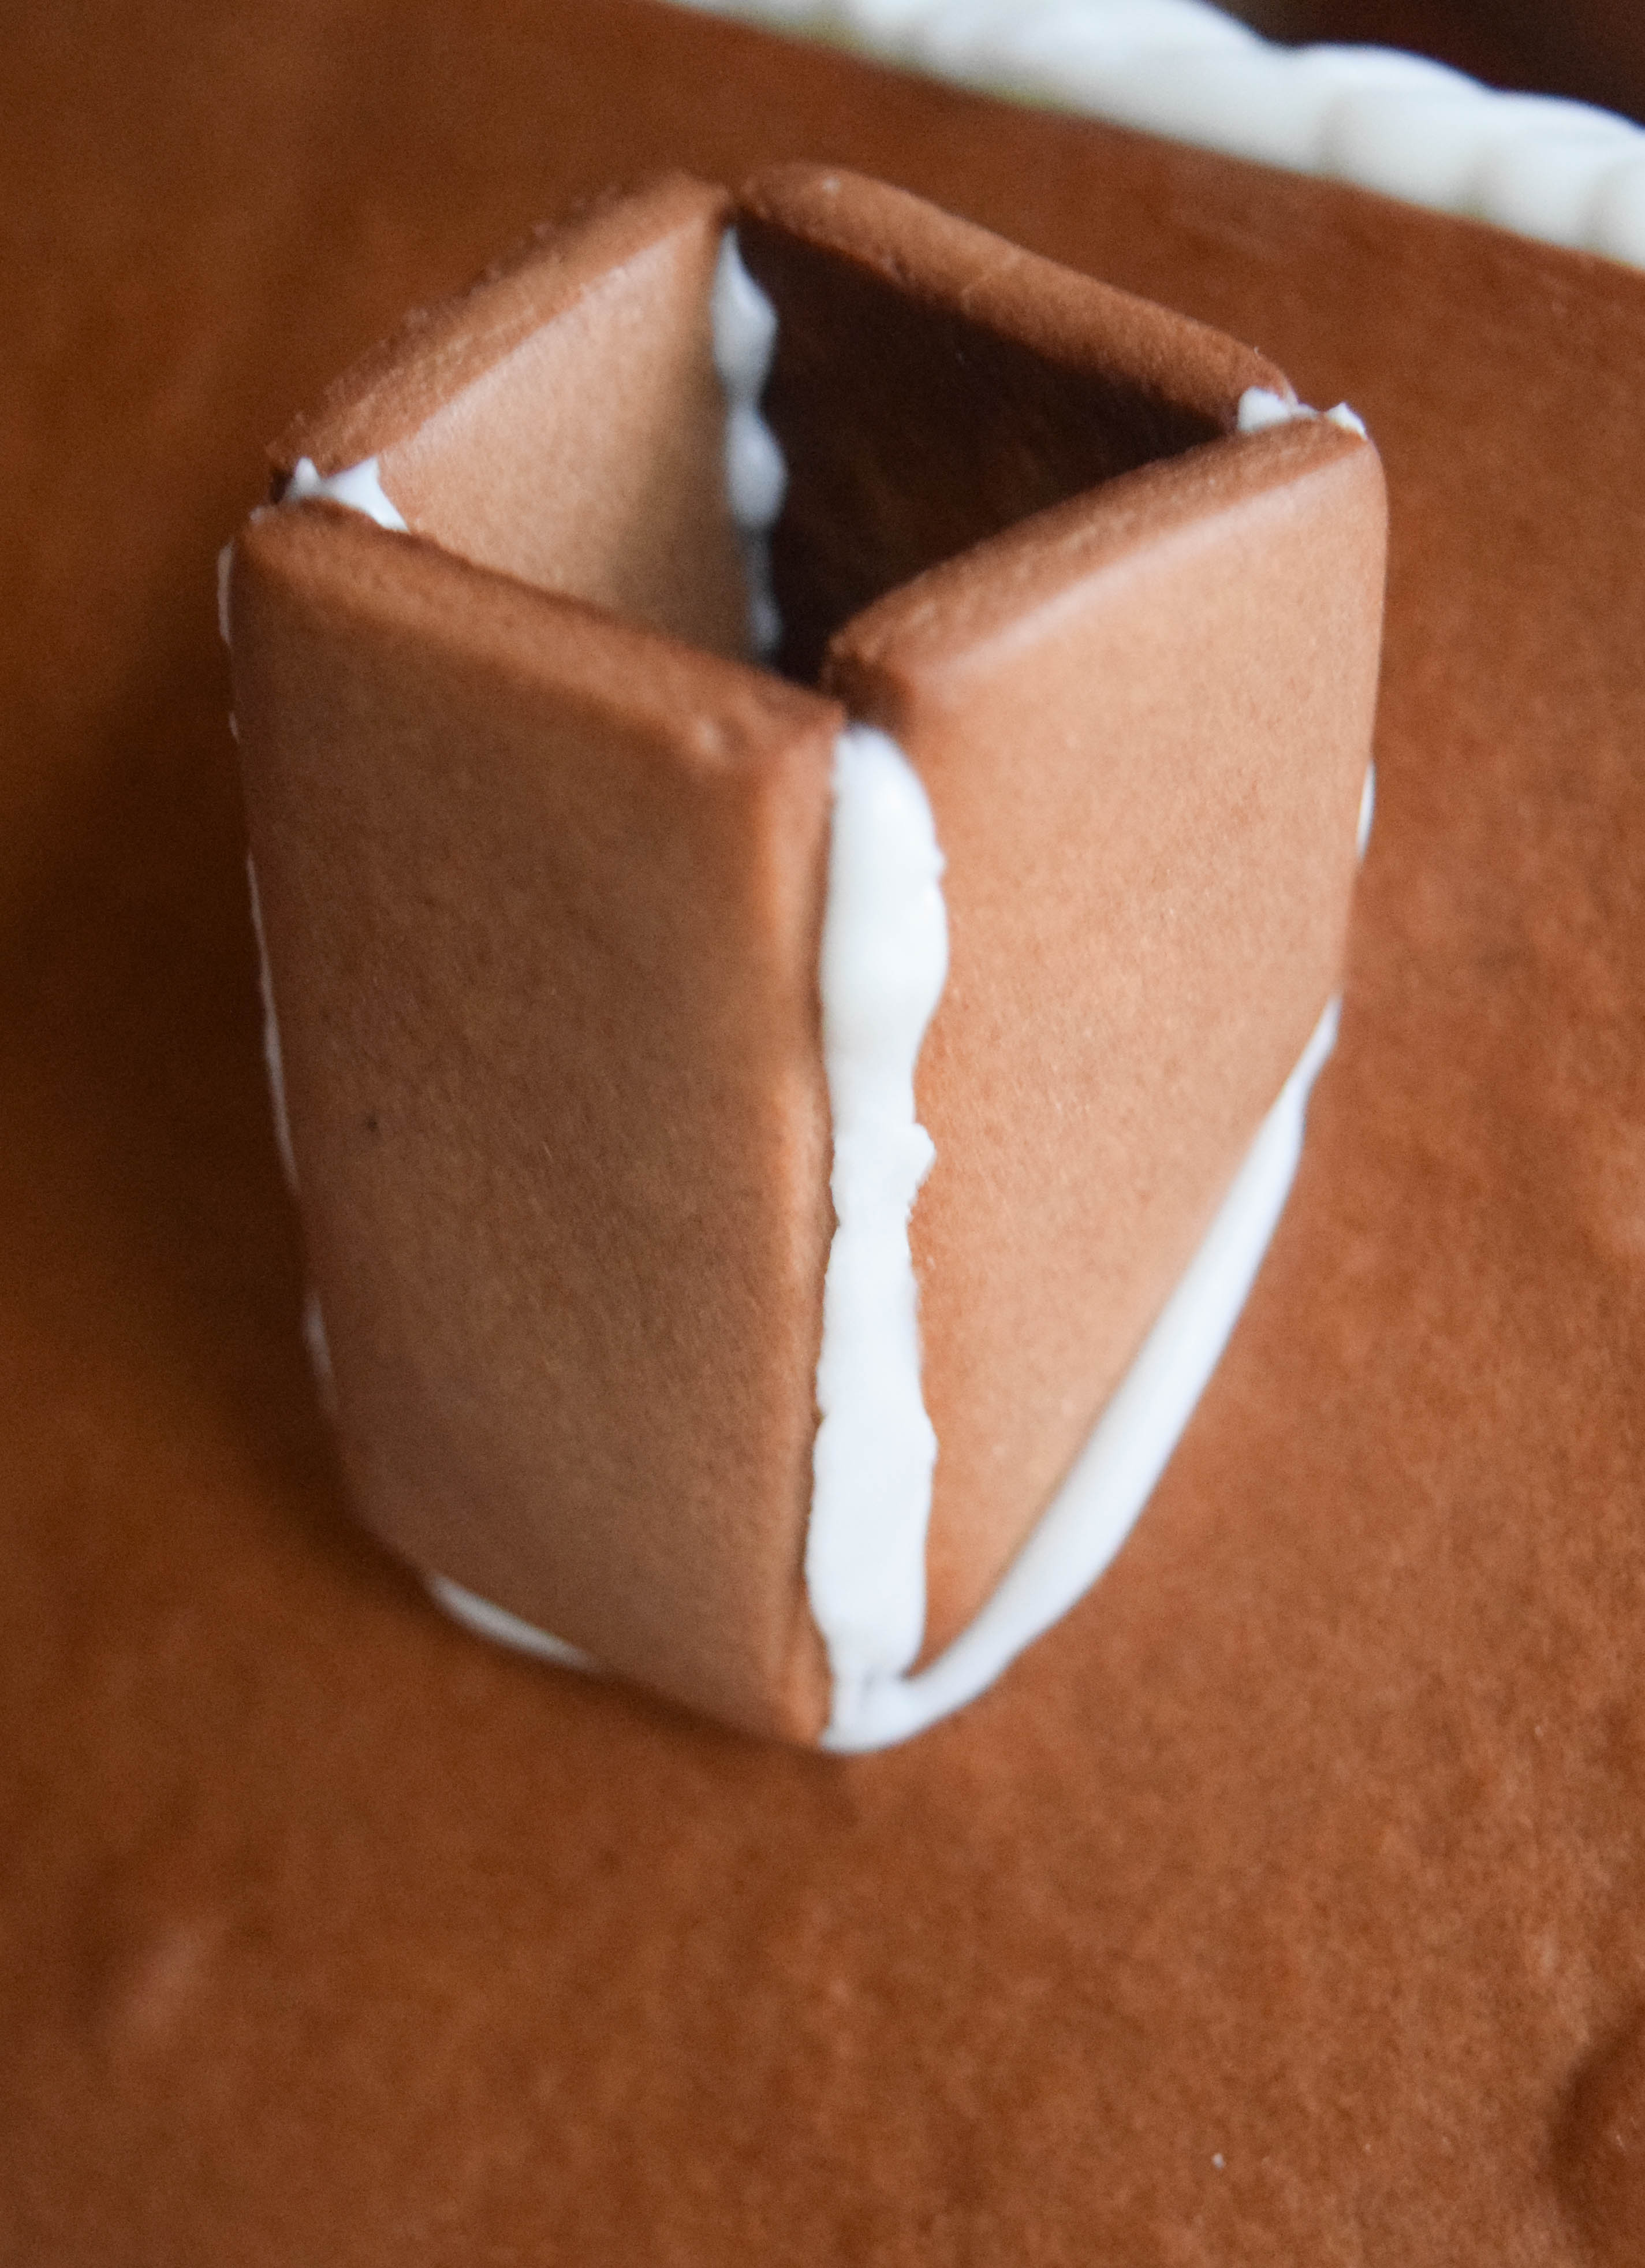
- When all the pieces are done, it’s time to assemble the house. Use the icing as glue. Starting with the walls, pipe a line of icing on the two edges you want to connect. Firmly press walls together for a couple of seconds. If the house appears to be instable, you can use books to support the walls until the icing has set (it shouldn’t be necessary, though). You can add another line of icing on the inside of each seam to secure it.

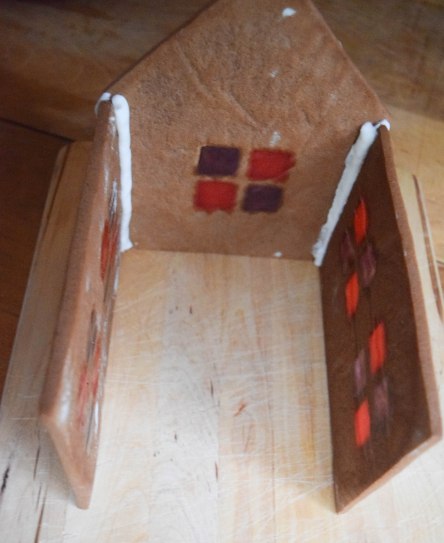
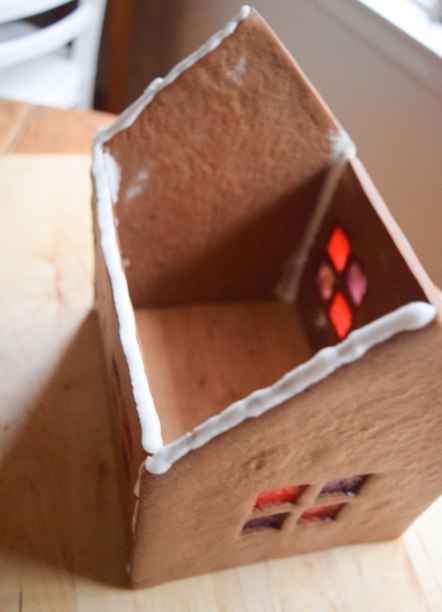
- Add the roof.
- Close any gaps with icing.
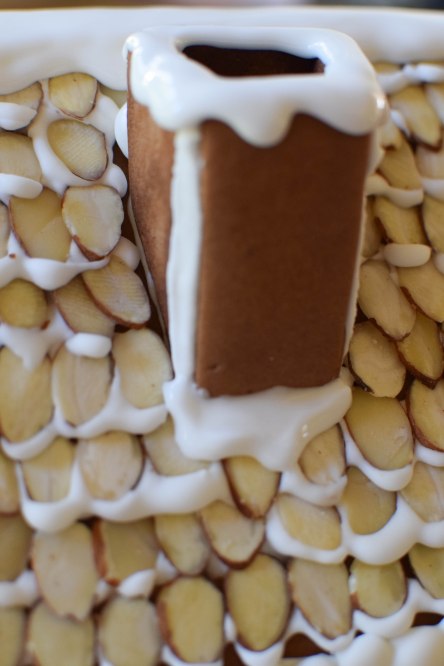
- Assemble the chimney and attach it to the roof.

- Before you start decorating, very gently position the house exactly where you want it on the board/platter. If you are using battery-powered LEDs to illuminate it, carefully lift up the house and slide the lights into it, leaving the battery box and switch outside.
- Now the real fun begins. [Tipp: If you are working with younger kids, it might be a good idea to let the icing set for 30 minutes to an hour to make sure the house is really stable before you begin decorating.]
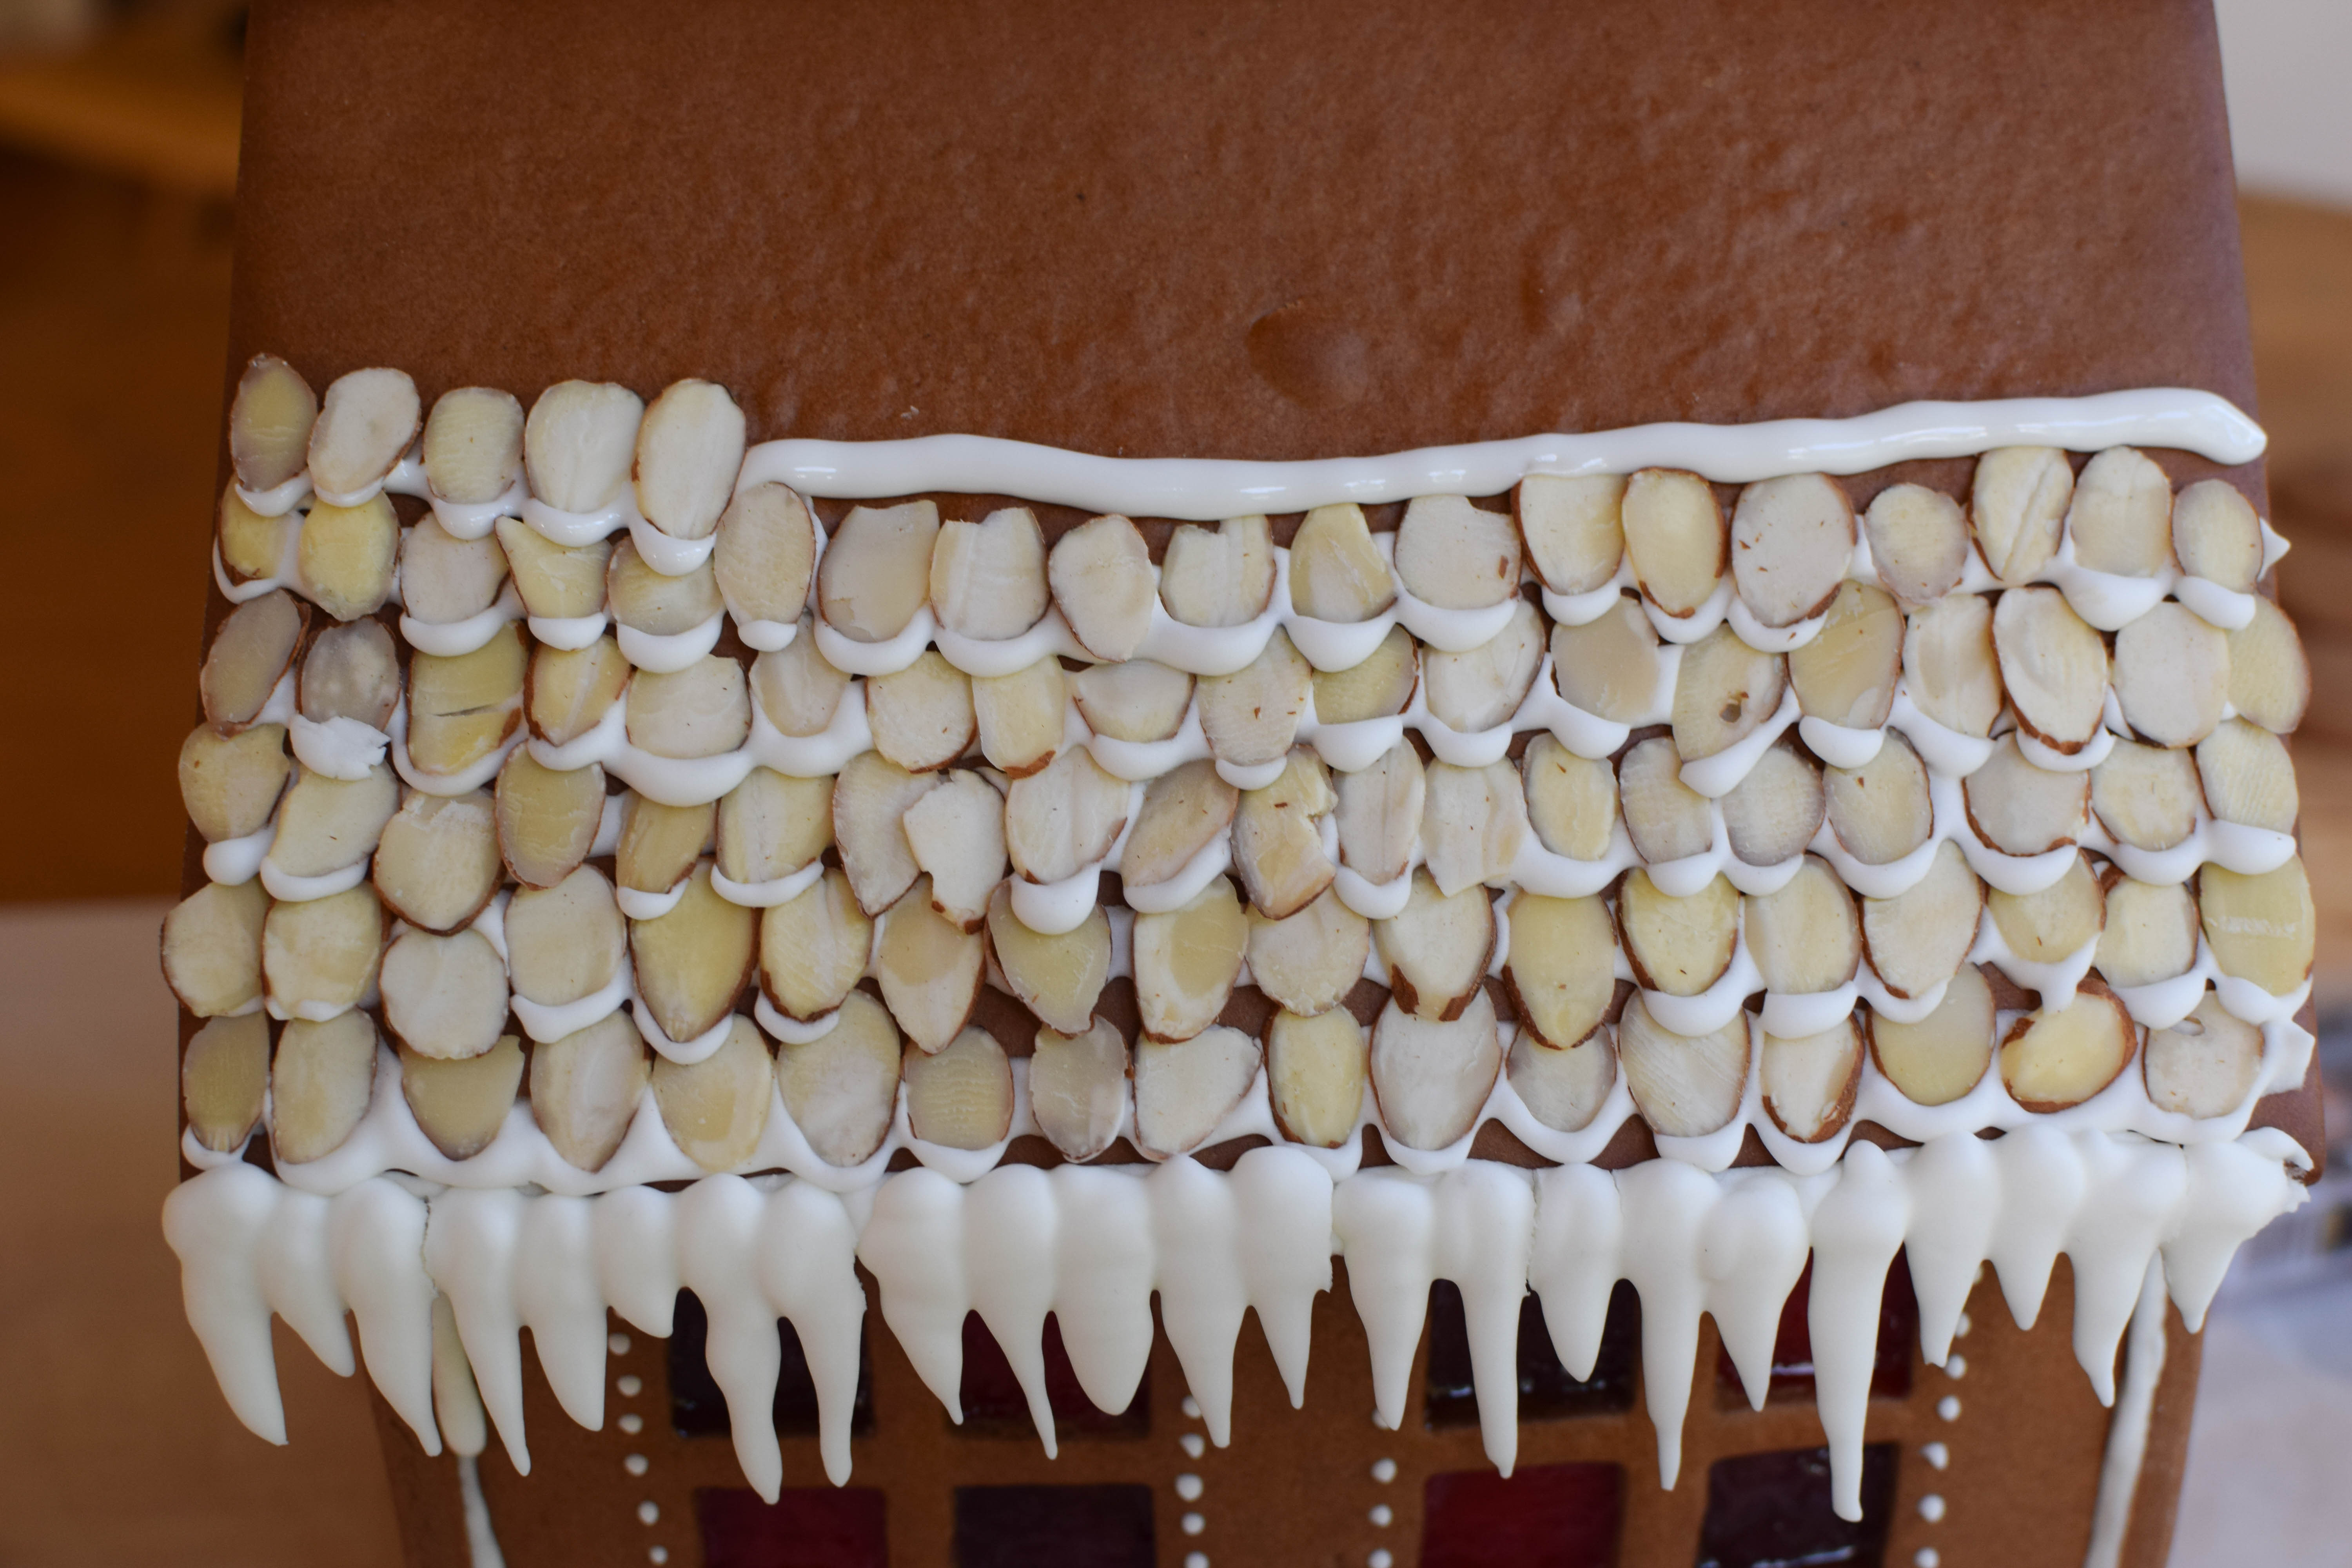
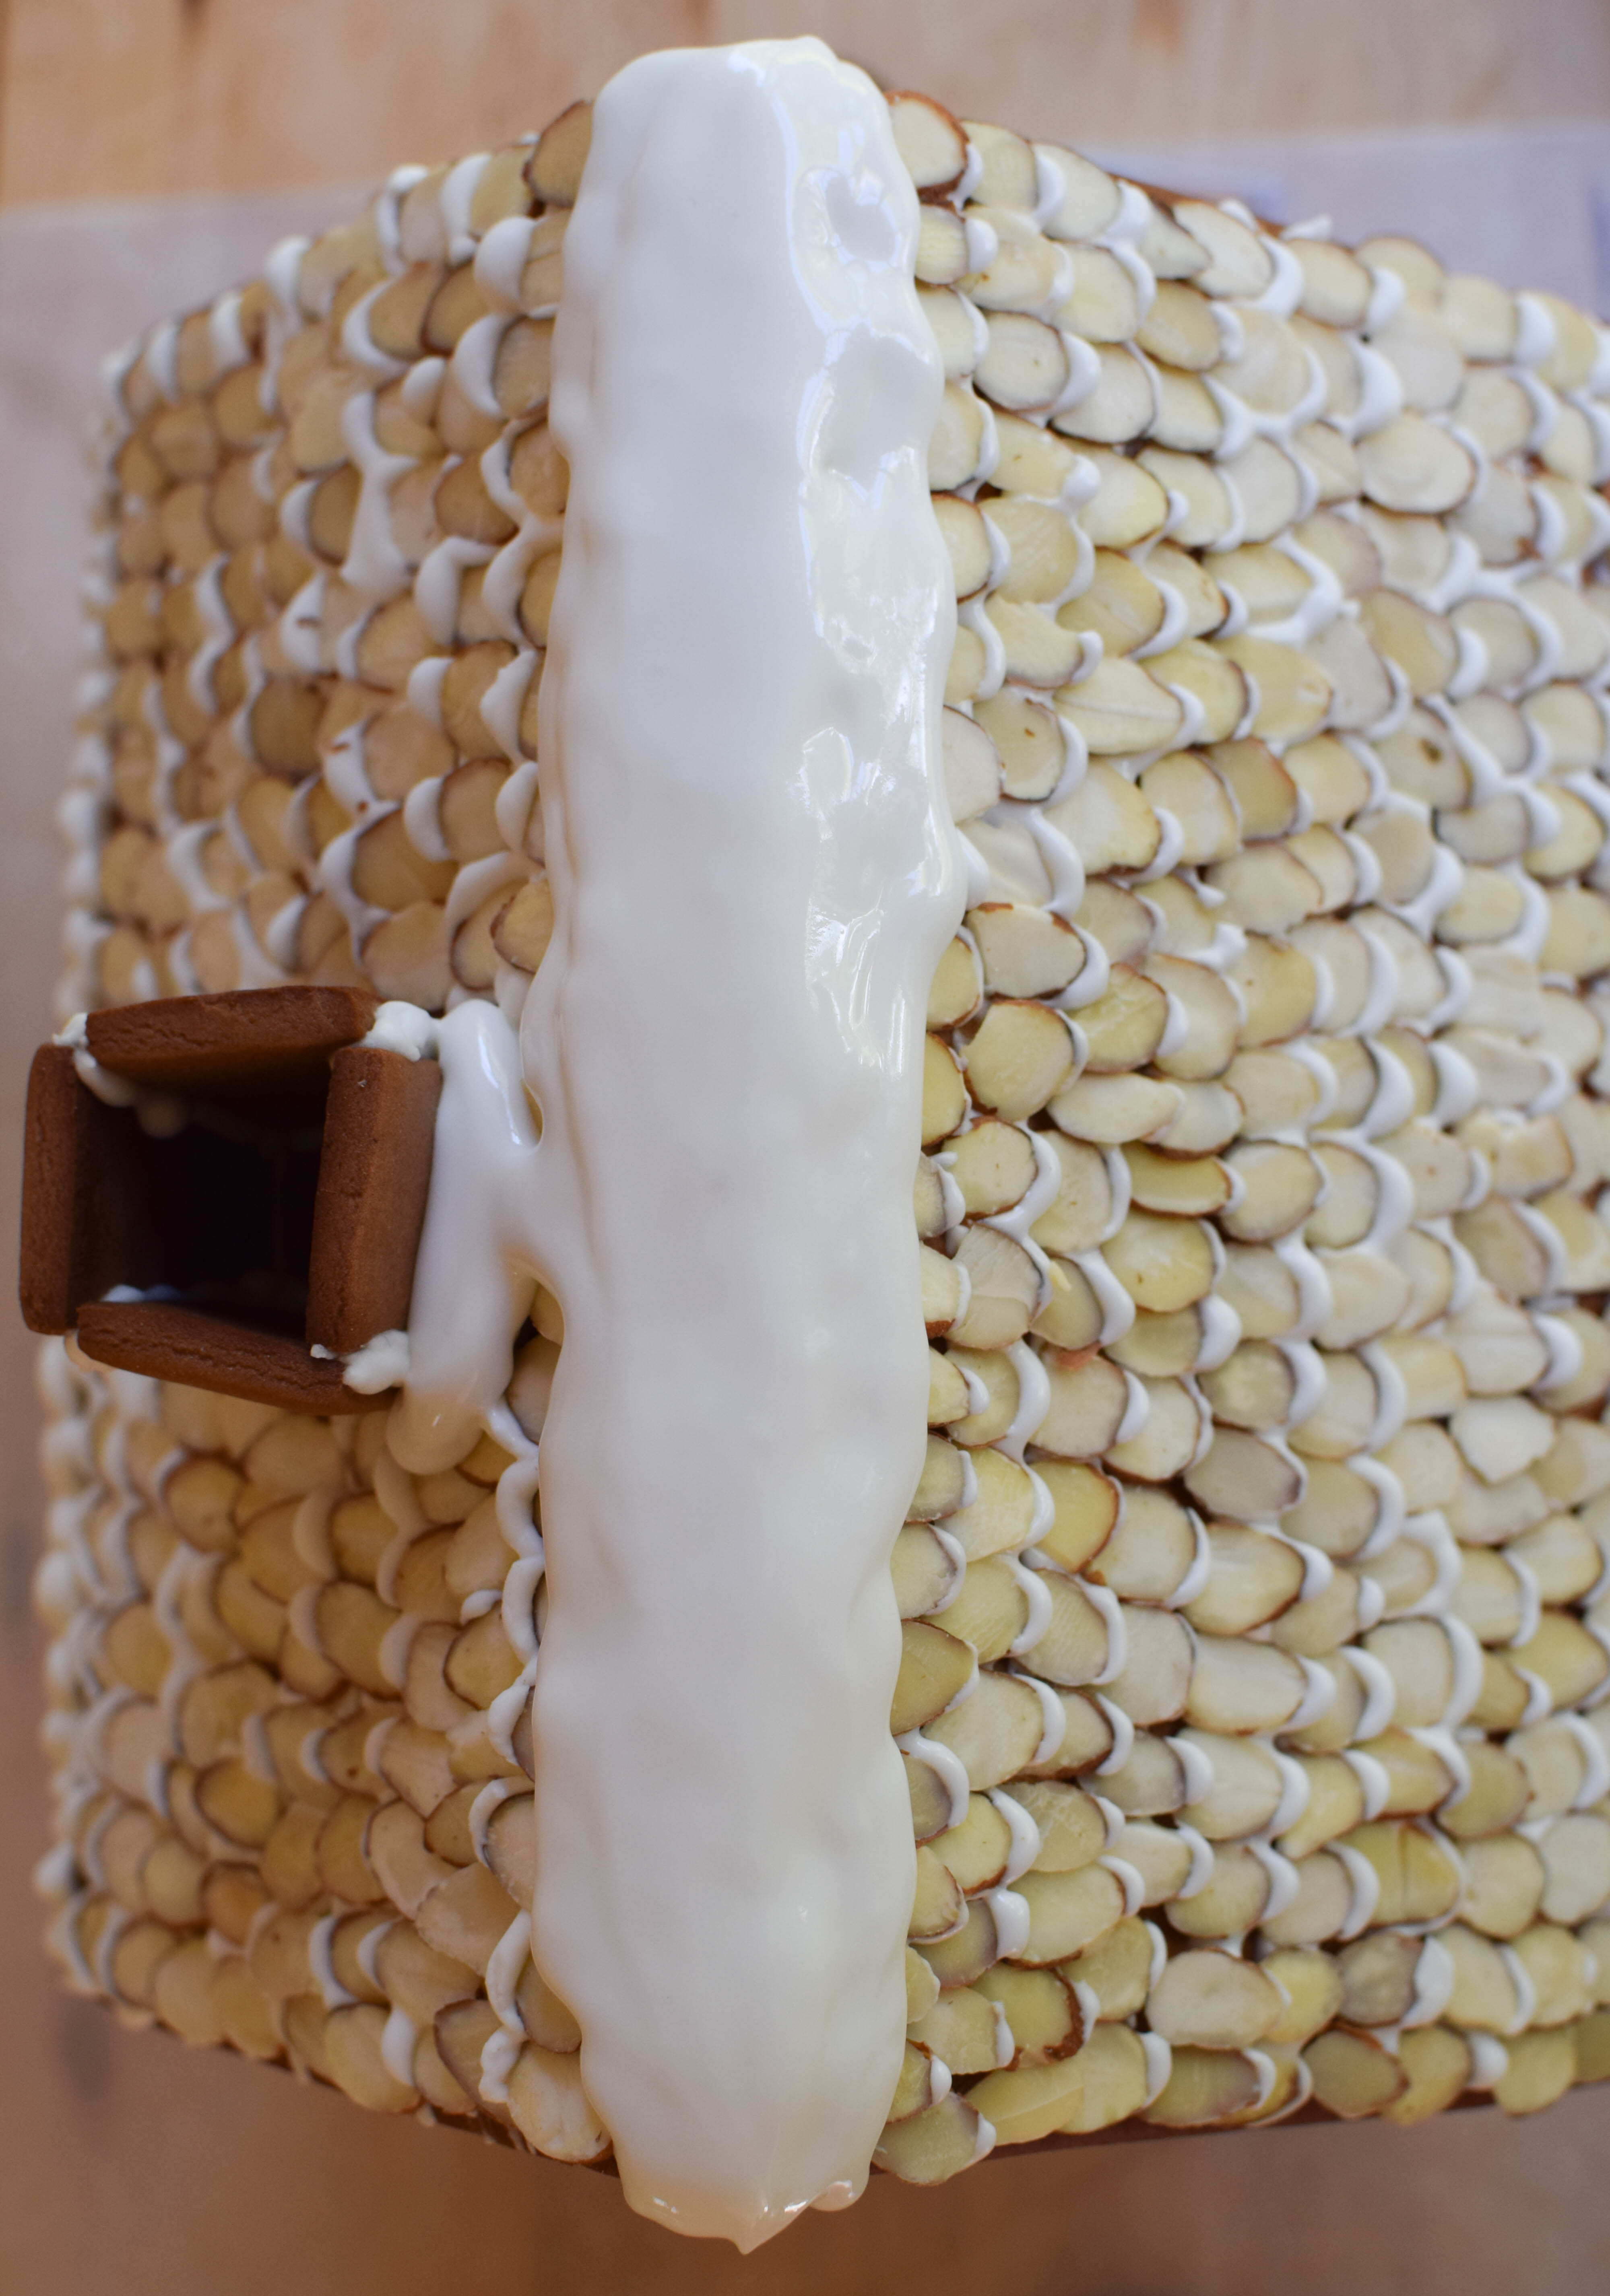
- I used sliced almonds as shingles for the roof. You can dip the tips into a little bit of icing so it looks like snow is collecting on the edges.

- Add little snowdrifts on the roof.
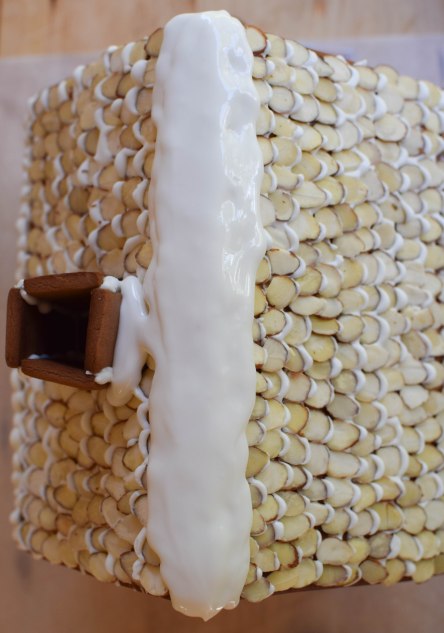
- Finish of the chimney with a little bit of icing snow.
- Decorate the walls.
- When you are finished, attach the icicles (this should really be done after you have decorated the roof and the walls, but as you can see in the pictures, I got a little ahead of myself).

- And don’t forget to decorate the yard, too.
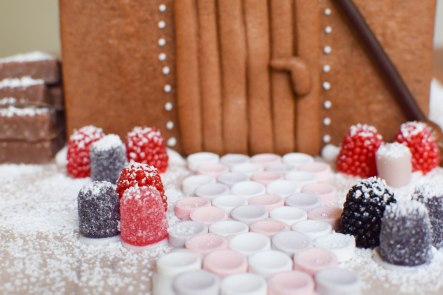
- For the finishing touch, cover up any cracks in the icicles with icing and sprinkle everything with a little bit of powdered sugar.


Enjoy!
Gingerbread Houses
Equipment:
- paper or cardstock templates
- board or large platter to build the house on
- battery-powered LEDs
Ingredients:
Dough:
- 16 ounces honey
- 7 ounces dark brown sugar
- 7 ounces butter
- 4 tablespoons water
- 2 teaspoons salt
- 27 ounces all purpose flour (plus extra for rolling the dough)
- 1.5 ounces unsweetened cocoa powder
- 2 teaspoons baking powder
- 2 teaspoons ground ginger
- 1 teaspoon cinnamon
- 1/2 teaspoon ground cloves
- 1/2 teaspoon ground star anise
- about 2 tablespoons milk
Windows:
- translucent hard candies (unfilled, such as Jolly Ranchers)
Icing:
- 3 egg whites
- 18 ounces powdered sugar
- 3/8 teaspoon cream of tartar
Decorations:
- assorted candy, cookies, and nuts, powdered sugar
- Combine egg whites and cream of tartar. Whip until stiff peaks form.
- Add powdered sugar in small portions.
- Pipe icicles on wax paper. Set aside to dry.
- In a large saucepan, combine honey, brown sugar, butter, water, and salt.
- Bring to a boil, stirring occasionally. Set aside to cool.
- In a large bowl, combine flour, cocoa powder, baking powder, and spices.
- Combine honey caramel mixture with dry ingredients. Knead until cohesive dough forms.
- Wrap dough in plastic wrap and transfer to fridge to rest over night (or up to two days).
- Preheat oven to 350°F.
- Finely crush candies for windows.
- Roll out dough to 1/4 inch thickness.
- Using templates, cut out walls, roof, and other pieces.
- Transfer to baking sheet lined with parchment paper before adding windows openings.
- Lightly brush with milk.
- Bake at 350°F for about 15 minutes. If walls have windows, remove from oven after 12 minutes, fill window openings with crushed candy and continue to bake until candy has melted, about 3 minutes.
- Let all pieces cool completely.
- Using icing as glue, assemble house, starting with the walls. Add roof. Assemble and attach chimney.
- Decorate.
Below are a couple of pictures of the houses some of my friends made to give you more inspiration. Aren’t they just adorable?


Oh my goodness this is the most amazing thing I’ve ever seen!!
LikeLiked by 1 person
Thank you so much. These are a lot of fun to make!
LikeLike
I couldn’t agree with you more, making my gingerbread house is my favourite Christmas tradition! Yours is so adorable!
LikeLike
Thanks! This was the first year I hosted a gingerbread decorating party and it was so much fun that we decided to make it a tradition (and it’s a great way to get rid of leftover Halloween candy).
LikeLike